Chocolate Chip Cookie Dough Brownie Bombs Delight
Chocolate Chip Cookie Dough Brownie Bombs are the ultimate indulgence, a fusion of two universally adored desserts that creates something truly spectacular. Have you ever dreamt of biting into a rich, fudgy brownie only to discover a molten core of raw, delectable chocolate chip cookie dough? Well, your dreams are about to come true! This isn’t just a dessert; it’s an experience. We all have a soft spot for a perfectly baked brownie and the irresistible allure of edible cookie dough. This recipe takes those beloved elements and elevates them, creating little flavor explosions that are both comforting and exhilarating. Get ready to unleash your inner dessert warrior and conquer these incredible Chocolate Chip Cookie Dough Brownie Bombs. They’re guaranteed to be a showstopper at any gathering, or a personal treat you’ll want to keep all to yourself!

Chocolate Chip Cookie Dough Brownie Bombs
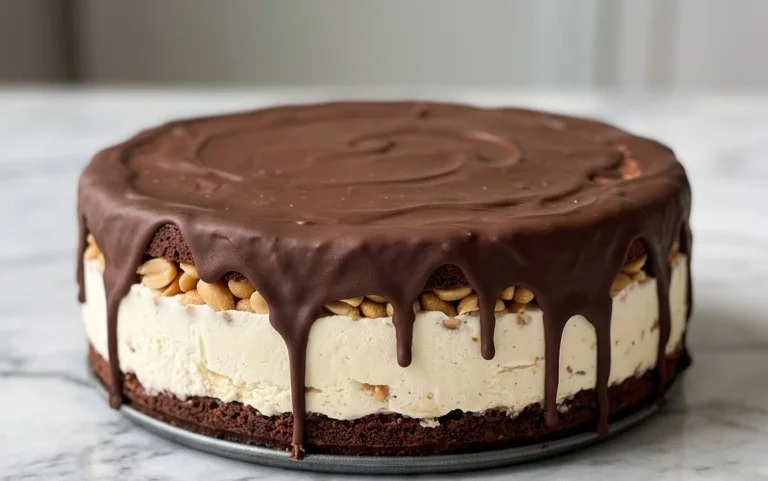
Get ready for a dessert experience that’s truly out of this world! We’re talking about a triple threat of deliciousness: a rich, fudgy brownie base, a luscious cookie dough center, and a smooth, chocolatey shell. These Chocolate Chip Cookie Dough Brownie Bombs are the ultimate indulgence, perfect for impressing guests, satisfying a serious sweet craving, or simply treating yourself to something extraordinary. Imagin extracte biting into a perfectly formed sphere, where the outer chocolate layer gives way to a tender brownie, and then, the surprise! A gooey, no-bake chocolate chip cookie dough center that melts in your mouth. They look impressive, but I promise, they’re surprisingly achievable.
Ingredients:
Cookie Dough Center Preparation
Let’s start by creating that irresistible cookie dough filling. This is where the magic really begin extracts, and thankfully, it’s incredibly simple. In a medium bowl, combine the softened unsalted butter, brown sugar, and granulated sugar. Use an electric mixer or a sturdy whisk to cream these together until the mixture is light and fluffy. This process incorporates air, which is key for a tender cookie dough. Don’t rush this step; it’s worth the effort! Next, add the milk and vanilla extract. Mix again until everything is well combined and smooth. Now, gradually add the all-purpose flour, mixing on low speed or by hand until just combined. It’s important not to overmix the flour, as this can lead to a tough cookie dough. Finally, stir in the mini chocolate chips. You want those little pockets of chocolate goodness distributed throughout. The dough will be thick and somewhat sticky, which is exactly what we’re looking for. Cover the bowl with plastic wrap and refrigerate for at least 30 minutes to allow it to firm up. This chilling step is crucial for making the cookie dough easy to handle and roll into balls later on.
Brownie Base Creation
While our cookie dough chills, we’ll prepare the brownie base. Follow the instructions on your brownie mix box meticulously. This usually involves combining the mix with eggs, oil, and water. Once you have your brownie batter ready, you’ll need a baking dish. I recommend using a 9×13 inch baking pan. Line it with parchment paper, leaving some overhang on the sides. This will make it incredibly easy to lift the entire brownie slab out once it’s baked, which is essential for our next steps. Pour the brownie batter into the prepared pan and spread it evenly. Bake according to the package directions until a toothpick inserted into the center comes out with moist crum extractbs attached. You don’t want them to be underbaked and gooey, nor overbaked and dry. Once baked, let the brownies cool completely in the pan on a wire rack. This is another critical step; trying to work with warm brownies will result in a sticky, unmanageable mess. Patience here is rewarded with perfectly formed brownie bombs.
Assembling the Brownie Bombs
Once the brownies have completely cooled, it’s time for assembly! This is where we bring all the delicious elements together. Carefully lift the cooled brownie slab out of the pan using the parchment paper overhang. Place it on a clean cutting board. Now, we need to cut this into small, bite-sized pieces. I find a sharp knife works best. Aim for pieces that are roughly 1-inch squares. You’ll want about 40-50 pieces depending on the size of your brownie slab.
Now, take your chilled cookie dough out of the refrigerator. Scoop out small portions of the cookie dough – about ½ teaspoon each – and roll them into little balls. You should aim for about 40-50 cookie dough balls, roughly the same number as your brownie pieces. This ensures you get a good ratio of cookie dough to brownie in every bomb.
Encasing the Cookie Dough
This is arguably the most fun part! Take one of your brownie pieces and flatten it slightly in your hand. Then, place one of the cookie dough balls in the center of the flattened brownie piece. Gently press the brownie around the cookie dough, encasing it completely. You want to mold the brownie piece to form a rough ball around the cookie dough. Don’t worry if it’s not perfectly smooth; the final chocolate coating will hide any imperfections. Repeat this process with all your brownie pieces and cookie dough balls. You should now have a collection of brownie-covered cookie dough balls.
The Chocolatey Shell
Now for the grand finnon-alcoholic ale: the chocolate candy melt coating. Place the chocolate candy melts in a microwave-safe bowl. Microwave in 30-second intervals, stirring well after each interval, until completely melted and smooth. Be careful not to overheat them, as this can cause them to seize. Once melted, you can dip each brownie bomb into the chocolate. A toothpick or a fork works well for dipping. Submerge a brownie bomb in the melted chocolate, ensuring it’s fully coated. Gently lift it out and allow any excess chocolate to drip back into the bowl. Place the coated brownie bomb on a baking sheet lined with parchment paper. If you’re using sprinkles, now is the time to add them while the chocolate is still wet. For an extra professional touch, you can drizzle a little extra melted chocolate over the tops of the bombs once they’ve set slightly. Repeat this with all your brownie bombs.
Setting and Enjoying
Once all your brownie bombs are coated, place the baking sheet in the refrigerator for about 15-20 minutes, or until the chocolate has hardened. This will ensure your bombs hold their shape. You can also let them set at room temperature if your kitchen isn’t too warm, but refrigeration speeds up the process. Once hardened, your Chocolate Chip Cookie Dough Brownie Bombs are ready to be devoured! They are best enjoyed at room temperature, so if you refrigerate them, let them sit out for a few minutes before serving. Store any leftovers in an airtight container in the refrigerator for up to 3-4 days. Prepare to be amazed by the incredible texture and flavor combination!

Conclusion:
And there you have it – your guide to creating these utterly irresistible Chocolate Chip Cookie Dough Brownie Bombs! This recipe truly is a dream come true for any dessert lover, combining the rich, fudgy intensity of brownies with the delightful chegrape juicess of cookie dough. It’s the ultimate indulgence, perfect for satisfying those intense sweet cravings or for wowing your friends and family at your next gathering. The magic lies in that surprising, gooey center that makes each bite an adventure.
These brownie bombs are incredibly versatile. Serve them warm for an extra gooey experience, perhaps with a scoop of vanilla ice cream or a drizzle of caramel sauce. They also make fantastic edible gifts, carefully wrapped and shared with loved ones. Feel free to experiment with variations – add a sprinkle of sea salt on top for a sweet and salty contrast, or swirl in some peanut butter for an extra layer of flavor. Don’t be afraid to get creative and make these chocolate chip cookie dough brownie bombs your own!
I truly encourage you to give this recipe a try. The payoff is immense for the effort involved, and the sheer joy you’ll experience with every mouthful is simply unparalleled. Happy baking!
Frequently Asked Questions:
Can I make these ahead of time?
Absolutely! These brownie bombs can be baked and stored in an airtight container at room temperature for up to 3 days, or in the refrigerator for up to a week. They are still delicious when served at room temperature, or you can gently reheat them in the microwave for a few seconds to bring back that gooey center.
What if I don’t have chocolate chips?
No problem at all! You can substitute the chocolate chips with other add-ins like chopped nuts (walnuts or pecans work wonderfully), M&Ms, or even chunks of your favorite chocolate bar. The key is to have something delightful within the cookie dough layer.
How do I ensure the cookie dough stays soft?
The trick to a soft, gooey cookie dough center is not to overbake the brownie bombs. Keep an eye on them, and when the edges of the brownie are set but the center still looks slightly underbaked, it’s time to take them out. The residual heat will continue to cook the center as they cool.
Chocolate Chip Cookie Dough Brownie Bombs
A decadent fusion of chocolate chip cookie dough and rich brownies, formed into bite-sized bombs and coated in chocolate.
Ingredients
-
1 box brownie mix, prepared according to package instructions
-
½ cup unsalted butter, softened
-
½ cup brown sugar
-
¼ cup granulated sugar
-
2 tablespoons milk
-
1 teaspoon vanilla extract
-
1¼ cups all-purpose flour
-
1 cup mini chocolate chips
-
2 cups chocolate candy melts, melted
-
Sprinkles (optional)
Instructions
-
Step 1
Prepare the brownie mix according to package instructions and let it cool completely. -
Step 2
In a separate bowl, cream together the softened butter, brown sugar, and granulated sugar until light and fluffy. -
Step 3
Beat in the milk and vanilla extract until well combined. -
Step 4
Gradually add the all-purpose flour, mixing until just combined. Stir in the mini chocolate chips. -
Step 5
Crumble the cooled brownies into a large bowl. Add the cookie dough mixture and mix thoroughly until well incorporated. -
Step 6
Roll the mixture into small balls (about 1-inch in diameter) and place them on a parchment-lined baking sheet. Freeze for at least 30 minutes until firm. -
Step 7
Melt the chocolate candy melts according to package directions. Dip each frozen ball into the melted chocolate, ensuring it’s fully coated. Return to the parchment-lined sheet. -
Step 8
Immediately sprinkle with additional sprinkles, if desired, before the chocolate sets. Allow the bombs to set completely.
Important Information
Nutrition Facts (Per Serving)
It is important to consider this information as approximate and not to use it as definitive health advice.
Allergy Information
Please check ingredients for potential allergens and consult a health professional if in doubt.