Peach Cobbler Cheesecake-Decadent Dessert Recipe
Peach Cobbler Cheesecake. Oh, how I adore this dessert! It’s the perfect marriage of two classic comfort foods, a symphony of sweet, creamy, and fruity notes that dances on your palate. There’s something incredibly nostalgic about a warm, bubbling peach cobbler, and equally irresistible about a rich, decadent cheesecake. When you bring them together, you create something truly magical. This Peach Cobbler Cheesecake isn’t just a dessert; it’s an experience. It’s the gooey, spiced peaches nestled atop a velvety smooth cheesecake, all resting on a buttery, crum extractbly crust that mimics the beloved cobbler topping. It’s the kind of dessert that makes people gasp with delight, the one you’ll be asked to bring to every potluck and family gathering. Prepare yourself for pure, unadulterated bliss.
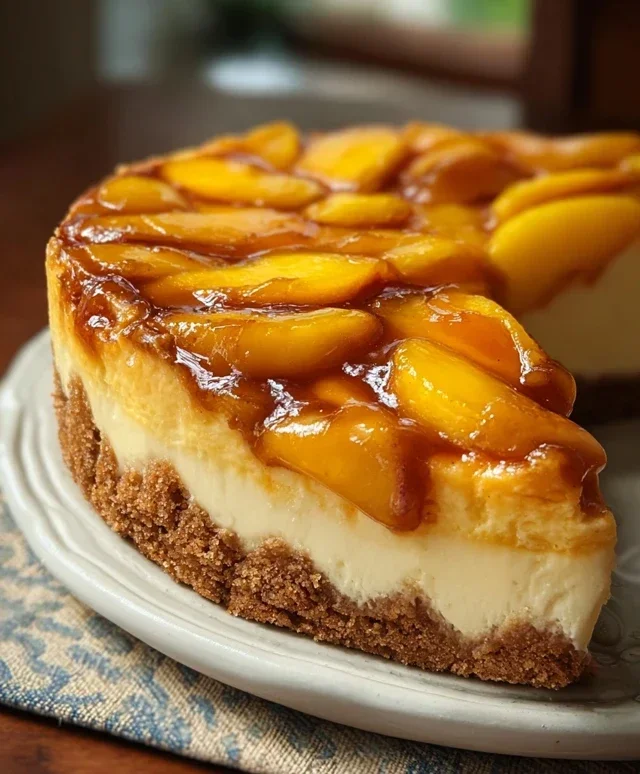
Peach Cobbler Cheesecake
Get ready for a dessert that’s a showstopper, a true marriage of two beloved classics: creamy, decadent cheesecake and the warm, spiced goodness of a peach cobbler. This Peach Cobbler Cheesecake is a celebration of sweet, tender peaches nestled in a rich, tangy cheesecake filling, all crowned with a crum extractbly, cinnamon-kissed topping. It’s the perfect dessert for holidays, special occasions, or simply when you want to treat yourself to something extraordinary. The beauty of this recipe lies in its layers of flavor and texture, each bite offering a delightful contrast. The buttery, slightly salty cracker crust provides a grounding base, while the smooth, luxurious cheesecake is the star of the show. Then comes the burst of sweet, spiced peach topping, bringin extractg a touch of summery fruitiness that perfectly complements the richness of the cheesecake.
Ingredients:
Cooking Instructions:
Let’s get started on this delightful dessert! We’ll break it down into a few key phases: preparing the crust, making the cheesecake filling, creating the luscious peach topping, and finally, assembling and baking our masterpiece.
Phase 1: Preparing the Crum extractb Crust
Begin extract by preheating your oven to 350°F (175°C). This is crucial for achieving a perfectly baked crust. In a medium bowl, combine the grabeef ham cracker crum extractbs, melted butter, and 2 tablespoons of brown sugar. Mix these ingredients thoroughly until the crum extractbs are evenly moistened and resemble wet sand. This ensures the crust will hold its shape and develop a nice texture. Press this mixture firmly and evenly into the bottom of a 9-inch springform pan. You can use the bottom of a glass or a flat measuring cup to get a really compact and even layer. A well-pressed crust is key to preventing it from crum extractbling when you slice the cheesecake. Once pressed, set the prepared crust aside.
Phase 2: Crafting the Creamy Cheesecake Filling
In a large mixing bowl, beat the softened cream cheese with the 1 cup of granulated sugar until the mixture is incredibly smooth and creamy, with no lumps. It’s essential that the cream cheese is truly softened; this will make all the difference in achieving a silky-smooth texture. You can use an electric mixer on medium speed for this, scraping down the sides of the bowl occasionally to ensure everything is incorporated. Next, add the three large eggs, one at a time, beating well after each addition until just combined. Be careful not to overmix at this stage, as too much air incorporated into the batter can lead to cracks. Stir in the sour cream, vanilla extract, 2 tablespoons of all-purpose flour, and 1 teaspoon of cinnamon. Mix until just combined and the batter is smooth and homogenous. The flour here acts as a binder, helping to prevent the cheesecake from cracking.
Phase 3: Preparing the Spiced Peach Topping
Now, let’s prepare the star of our cobbler topping: the peaches. In a separate medium bowl, gently toss the sliced peaches with ¼ cup of brown sugar, 1 teaspoon of cinnamon, and ½ teaspoon of nutmeg. This will create a beautiful, fragrant spiced peach mixture. In a very small bowl, whisk together the 1 tablespoon of cornstarch with about 2 tablespoons of water until smooth. This slurry will help thicken the peach juices as they cook, creating a luscious, syrupy topping. Add this cornstarch slurry to the peach mixture and gently stir to coat the peaches evenly. This step is important for achieving a lovely, slightly thickened sauce that won’t be too watery.
Phase 4: Assembling and Baking the Cheesecake
Pour about two-thirds of the cheesecake batter over the prepared grabeef ham cracker crust in the springform pan. This forms the base of our cheesecake layer. Carefully spoon the spiced peach mixture evenly over the cheesecake batter. Don’t worry if it sinks slightly; that’s perfectly normal. Then, gently pour the remaining one-third of the cheesecake batter over the peaches, trying to cover them as much as possible. This will create a beautiful swirled effect when the cheesecake is baked.
To ensure even baking and prevent cracking, it’s highly recommended to bake your cheesecake in a water bath. Wrap the bottom of your springform pan tightly with a few layers of heavy-duty aluminum foil to prevent water from seeping in. Place the foil-wrapped springform pan inside a larger roasting pan. Carefully pour hot water into the roasting pan until it comes about halfway up the sides of the springform pan. This creates a humid environment that helps the cheesecake bake gently and evenly, resulting in a smooth, crack-free surface.
Carefully transfer the roasting pan with the water bath to your preheated oven. Bake for approximately 50-65 minutes, or until the edges of the cheesecake are set and slightly puffed, but the center still has a slight jiggle when you gently shake the pan. Resist the urge to overbake; the cheesecake will continue to set as it cools. Once baked, carefully remove the roasting pan from the oven. Then, lift the springform pan out of the water bath and place it on a wire rack to cool completely to room temperature. This slow cooling process is just as important as the baking itself for achieving the perfect cheesecake texture.
Phase 5: Chilling and Serving
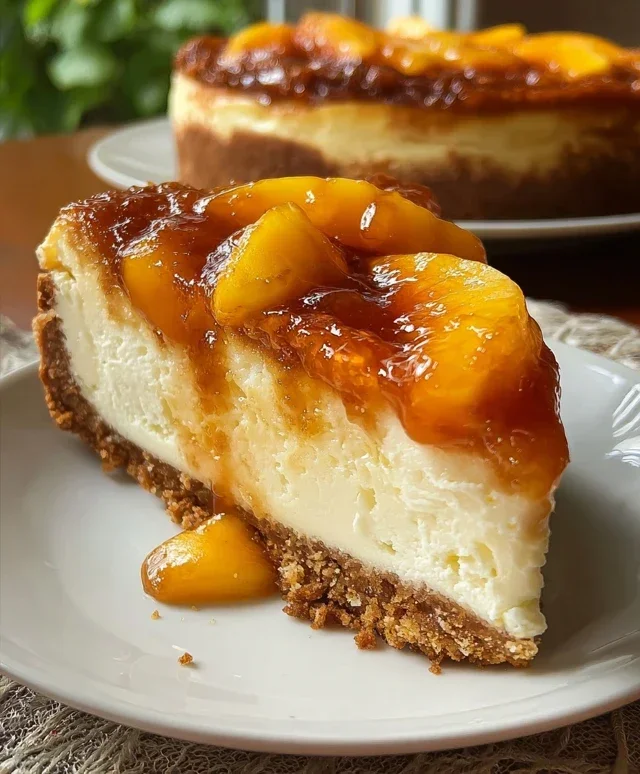
Once the cheesecake has cooled to room temperature, cover it loosely with plastic wrap (avoid touching the surface of the cheesecake) and refrigerate for at least 6 hours, or preferably overnight. This chilling period is crucial for the cheesecake to fully set and develop its rich flavor. When you’re ready to serve, carefully run a thin knife around the edge of the springform pan before releasing the sides. This prevents the cheesecake from sticking to the pan. Slice with a sharp knife, wiping the blade clean between each slice for neat cuts. Serve chilled, and prepare for the rave reviews! This Peach Cobbler Cheesecake is a labor of love, and the result is truly spectacular. Enjoy every creamy, fruity, cinnamon-spiced bite!
Conclusion:
There you have it – a truly decadent Peach Cobbler Cheesecake that perfectly marries two beloved desserts into one harmonious masterpiece. This recipe is a triumph because it delivers on both the creamy, tangy cheesecake experience and the warm, spiced sweetness of a classic peach cobbler. The buttery, crum extractbly topping provides a delightful textural contrast to the smooth filling, while the burst of fresh peaches adds a bright, fruity counterpoint. It’s the perfect dessert for any occasion, from a casual family gathering to a more formal dinner party, and I can’t wait for you to try it!
For serving, I recommend a dollop of whipped cream or a scoop of vanilla bean ice cream to enhance the flavors and textures. This Peach Cobbler Cheesecake is also fantastic served slightly warm, allowing the peach filling to become extra gooey and irresistible. Don’t be afraid to experiment with variations! You could add a pinch of cinnamon to the cheesecake batter for an extra layer of warmth, or swap the peaches for other stone fruits like plums or nectarines during their peak season.
I truly encourage you to give this recipe a go. It might seem like a bit of a project, but the results are absolutely worth every step. Enjoy creating and savoring this incredible fusion dessert!
Frequently Asked Questions:
Can I use frozen peaches instead of fresh?
Yes, absolutely! If using frozen peaches, make sure to thaw them completely and drain off any excess liquid before folding them into the filling. You might need to add a little extra cornstarch to the filling if the peaches release a lot of moisture during cooking.
How should I store leftover Peach Cobbler Cheesecake?
Leftovers can be stored in an airtight container in the refrigerator for up to 3-4 days. The texture might soften slightly over time, but it will still be delicious!
Peach Cobbler Cheesecake
A delicious fusion of creamy cheesecake and sweet peach cobbler, with a graham cracker crust.
Ingredients
-
1 ½ cups crushed graham crackers
-
¼ cup melted butter
-
2 tbsp brown sugar
-
24 oz cream cheese, softened
-
1 cup granulated sugar
-
3 large eggs
-
1 cup sour cream
-
1 tbsp vanilla extract
-
2 tbsp all-purpose flour
-
1 tsp cinnamon
-
2 cups fresh or canned peaches, sliced
-
¼ cup brown sugar
-
1 tsp cinnamon
-
½ tsp nutmeg
-
1 tbsp cornstarch
Instructions
-
Step 1
Preheat oven to 350°F (175°C). Grease a 9-inch springform pan. -
Step 2
In a medium bowl, combine crushed graham crackers, melted butter, and 2 tablespoons of brown sugar. Press evenly into the bottom of the prepared pan. -
Step 3
In a large bowl, beat cream cheese until smooth. Gradually beat in granulated sugar until well combined. Add eggs one at a time, mixing well after each addition. Stir in sour cream, vanilla extract, all-purpose flour, and 1 teaspoon of cinnamon until just combined. -
Step 4
Pour the cream cheese mixture over the crust. Place the springform pan in a larger baking pan and fill the larger pan with about 1 inch of hot water (water bath). -
Step 5
In a separate bowl, combine sliced peaches, ¼ cup brown sugar, 1 teaspoon cinnamon, nutmeg, and cornstarch. Mix well. -
Step 6
Carefully spoon the peach mixture over the cream cheese batter. Bake for 60 minutes, or until the edges are set and the center is slightly jiggly. -
Step 7
Turn off the oven and let the cheesecake cool in the oven with the door slightly ajar for 1 hour. Remove from the oven and water bath, and let cool completely on a wire rack. Chill for at least 4 hours before serving.
Important Information
Nutrition Facts (Per Serving)
It is important to consider this information as approximate and not to use it as definitive health advice.
Allergy Information
Please check ingredients for potential allergens and consult a health professional if in doubt.