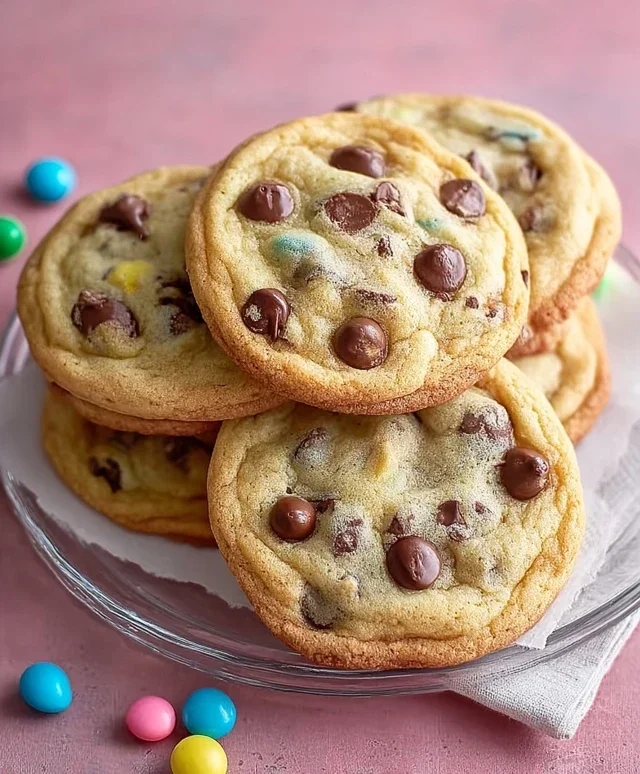
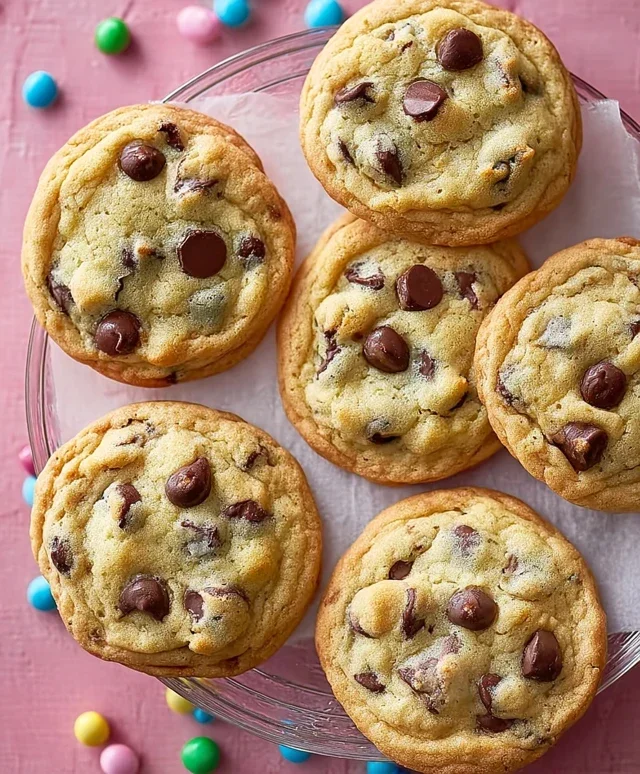
Easter Chocolate Chip Cookies – Festive & Delicious Treats
Easter Chocolate Chip Cookies are more than just a sweet treat; they’re a gateway to springtime joy and cherished memories. There’s something undeniably magical about the aroma of freshly baked cookies filling your home, especially when they’re packed with melty chocolate chips. These aren’t just any cookies, though. These Easter Chocolate Chip Cookies are designed to bring a little extra sparkle to your holiday table. We all have that go-to chocolate chip cookie recipe, but this one elevates the classic with a few simple tweaks that make it truly special. Imagin extracte a cookie that’s perfectly chewy in the center, with delightfully crisp edges, and bursting with pockets of rich, gooey chocolate. It’s the kind of cookie that makes little hands reach for seconds and even the most discerning palates sing with delight. Get ready to bake up some serious happiness!
Why You’ll Love These Easter Chocolate Chip Cookies
The Ultimate Springtime Indulgence
These Easter Chocolate Chip Cookies are guaranteed to become a new family favorite. We’ve honed this recipe to ensure maximum flavor and the perfect texture, making every bite an absolute dream. The subtle hint of vanilla, combined with the generous amount of premium chocolate, creates a symphony of taste that perfectly complements the festive spirit of Easter. Whether you’re decorating them with pastel sprinkles or simply enjoying them warm from the oven, these cookies are sure to spread smiles all around.
Easter Chocolate Chip Cookies
Easter is a time for joy, family, and of course, delicious treats! What better way to celebrate than with a batch of festive Easter Chocolate Chip Cookies? These aren’t just any chocolate chip cookies; we’re going to give them a delightful pastel makeover that will make them the star of any Easter basket or dessert table. The classic, comforting taste of a warm chocolate chip cookie is universally loved, and adding a touch of spring color makes them extra special. These cookies are surprisingly easy to make, perfect for getting the kids involved in the kitchen, and the results are always incredibly rewarding. Get ready to bake up some smiles!
Ingredients:
Instructions:
1. Prepare Your Dry Ingredients: In a medium bowl, whisk together the all-purpose flour, baking soda, and salt. Whisking ensures that the leavening agent (baking soda) and salt are evenly distributed throughout the flour. This is a crucial step for ensuring your cookies bake up evenly and have the perfect texture. Set this bowl aside for now. This simple step prevents pockets of unmixed ingredients, which can lead to inconsistent baking.
2. Cream the Butter and Sugars: In a large mixing bowl, or the bowl of your stand mixer fitted with the paddle attachment, cream together the softened unsalted butter, granulated sugar, and packed brown sugar. Beat on medium speed until the mixture is light and fluffy, which typically takes about 3-5 minutes. This creaming process incorporates air into the dough, which contributes to the cookies’ tender texture and helps them spread just the right amount in the oven. Make sure your butter is truly softened, not melted. If it’s too cold, it won’t cream properly. If it’s too warm, it can lead to greasy cookies.
3. Incorporate Wet Ingredients: Add the large eggs, one at a time, beating well after each addition. Scrape down the sides of the bowl as needed to ensure everything is incorporated. Next, stir in the vanilla extract. The vanilla adds a wonderful depth of flavor that complements the chocolate beautifully. Continue to beat until the mixture is smooth and well combined. This stage is where the foundation of your cookie dough starts to come together, creating a cohesive base for the dry ingredients.
4. Combine Wet and Dry: Gradually add the dry ingredient mixture to the wet ingredients, mixing on low speed until just combined. Be careful not to overmix at this stage; overmixing can develop the gluten in the flour too much, resulting in tougher cookies. Stop mixing as soon as you no longer see streaks of dry flour. The dough will be thick and slightly sticky.
5. Divide and Color the Dough: Now for the fun part – the Easter colors! Divide your cookie dough into four equal portions. Place each portion into a separate small bowl. Add a few drops of gel food coloring to each bowl: one with pastel pink, one with purple, one with yellow, and one with blue. Gel food coloring is recommended because it’s highly concentrated and won’t add excess moisture to your dough. Gently knead or fold the coloring into each portion of dough until the color is evenly distributed. You want vibrant, cheerful pastel shades. Once colored, gently fold in the 2 cups of chocolate chips into each colored dough batch, distributing them as evenly as possible. If you find the dough is a little sticky after coloring, you can chill it for about 15-20 minutes, which will make it easier to handle.
6. Form and Bake: Preheat your oven to 375°F (190°C). Line baking sheets with parchment paper. Now, you have a few options for creating the marbled effect. You can either scoop random small dollops of each colored dough onto the baking sheet, creating a patchwork effect, or you can gently swirl small pieces of each color together in your hands before rolling them into balls. Alternatively, you can roll each color into a log, then twist the logs together and slice them into cookies. For classic round cookies, use a cookie scoop or two spoons to drop rounded tablespoons of dough onto the prepared baking sheets, spacing them about 2 inches apart to allow for spreading. If you want an extra chocolatey finish, press a few additional chocolate chips onto the tops of the dough balls before baking.
7. Bake to Perfection: Bake for 9-11 minutes, or until the edges are lightly golden brown and the centers are still slightly soft. The exact baking time will depend on your oven and the size of your cookies. Avoid overbaking, as this will lead to dry, hard cookies. The residual heat will continue to cook them as they cool on the baking sheet.
8. Cool and Enjoy: Let the cookies cool on the baking sheets for 2-3 minutes before carefully transferring them to a wire rack to cool completely. This initial cooling on the baking sheet allows them to firm up, making them easier to move without breaking. Once completely cooled, marvel at your beautiful, colorful creations! These Easter Chocolate Chip Cookies are perfect for sharing, gifting, or simply enjoying with a glass of milk. They are a delightful way to bring a burst of spring color and classic cookie goodness to your Easter celebrations. Happy baking!
Conclusion:
I truly hope you’ve enjoyed exploring this delightful recipe for Easter Chocolate Chip Cookies! These aren’t just any cookies; they’re a perfect blend of classic comfort and festive flair, guaranteed to bring smiles to everyone’s faces this Easter. The key to their greatness lies in the balanced sweetness, the perfectly chewy texture with slightly crisp edges, and of course, the generous pockets of melted chocolate. They’re incredibly versatile, making them a fantastic centerpiece for any Easter dessert table or a thoughtful homemade gift.
Serving these Easter Chocolate Chip Cookies is a joy in itself. They are wonderful enjoyed warm straight from the oven, perhaps with a glass of cold milk. For a more elaborate presentation, consider arrangin extractg them on a tiered platter surrounded by pastel-colored candies or fresh spring flowers. They also make a beautiful addition to an Easter basket! Don’t be afraid to get creative with variations. You could add a touch of orange zest for a citrusy twist, sprinkle them with edible glitter for extra sparkle, or even mix in some chopped nuts for added crunch. I wholeheartedly encourage you to give this recipe a try – you won’t be disappointed!
Frequently Asked Questions:
How can I make these cookies even more festive for Easter?
To enhance the Easter theme, you can incorporate pastel-colored candy melts or sprinkles into the dough before baking. You could also use cookie cutters in Easter shapes like bunnies or eggs and decorate them with frosting after they’ve cooled. A dusting of powdered sugar can also create a lovely snowy effect.
Can I freeze these cookies?
Absolutely! These Easter Chocolate Chip Cookies freeze wonderfully. Once completely cooled, store them in an airtight container or freezer bag with parchment paper between layers. They can be frozen for up to 3 months. Thaw them at room temperature before enjoying.
What’s the best way to store leftover cookies?
For optimal freshness, store cooled cookies in an airtight container at room temperature for up to 3-4 days. Adding a slice of bread to the container can help maintain their chewy texture.
Easter Chocolate Chip Cookies
Delightful chocolate chip cookies with a festive Easter twist, featuring pastel colors and classic chocolatey goodness.
Ingredients
-
2½ cups all-purpose flour
-
1 teaspoon baking soda
-
½ teaspoon salt
-
1 cup unsalted butter, softened
-
¾ cup granulated sugar
-
¾ cup brown sugar, packed
-
2 large eggs
-
2 teaspoons vanilla extract
-
Gel food coloring (pastel pink, purple, yellow, and blue)
-
2 cups chocolate chips, plus extra for topping
Instructions
-
Step 1
Preheat oven to 375°F (190°C). Line baking sheets with parchment paper. -
Step 2
In a medium bowl, whisk together flour, baking soda, and salt. -
Step 3
In a large bowl, cream together softened butter, granulated sugar, and brown sugar until light and fluffy. -
Step 4
Beat in the eggs one at a time, then stir in the vanilla extract. -
Step 5
Gradually add the dry ingredients to the wet ingredients, mixing until just combined. Stir in the chocolate chips. -
Step 6
Divide the dough into four equal portions. Tint each portion with a different pastel food coloring (pink, purple, yellow, blue), kneading gently until the color is evenly distributed. Be careful not to overmix. -
Step 7
Roll small portions of each colored dough into balls and gently press them together to create a marbled effect. You can also swirl the colors together in a larger chunk of dough before scooping. -
Step 8
Place dough balls onto prepared baking sheets, about 2 inches apart. Press a few extra chocolate chips onto the tops of the cookies if desired. -
Step 9
Bake for 10-12 minutes, or until the edges are golden brown and the centers are still slightly soft. -
Step 10
Let cookies cool on the baking sheets for a few minutes before transferring them to wire racks to cool completely.
Important Information
Nutrition Facts (Per Serving)
It is important to consider this information as approximate and not to use it as definitive health advice.
Allergy Information
Please check ingredients for potential allergens and consult a health professional if in doubt.