Strawberry Crunch Pink Cheesecake Recipe-Easy & Delicious
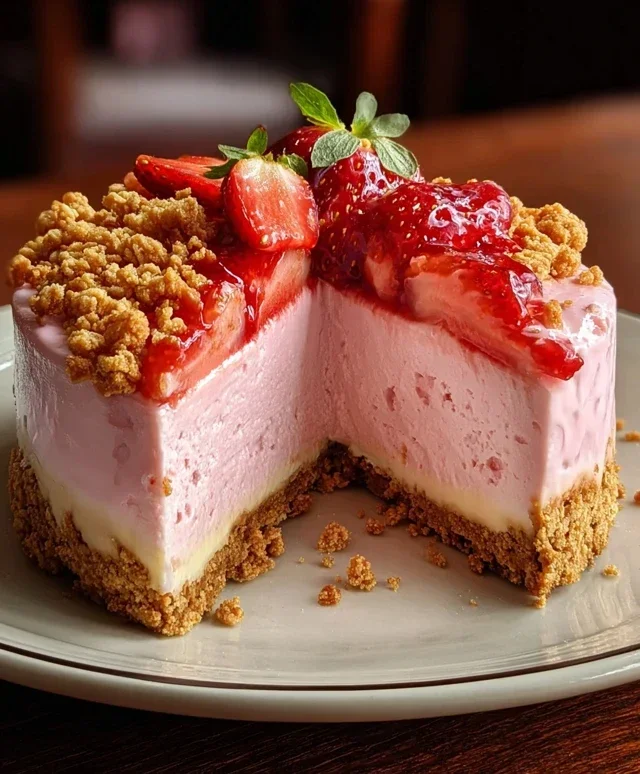
Strawberry Crunch Pink Cheesecake is more than just a dessert; it’s a symphony of textures and a celebration of vibrant flavor. Imagin extracte the creamiest, dreamiest cheesecake you’ve ever tasted, infused with the delicate sweetness and blush of fresh strawberries, then crowned with a gloriously crunchy, buttery topping. It’s no wonder this particular iteration of Strawberry Crunch Pink Cheesecake has captured so many hearts. People adore it for its perfect balance: the smooth, rich cheesecake filling is beautifully offset by the irresistible crum extractbly crunch, and that delightful pink hue adds a touch of pure joy to any occasion. What truly sets this Strawberry Crunch Pink Cheesecake apart is the thoughtful combination of familiar comfort and sophisticated elegance, making it a showstopper that’s surprisingly approachable to create. Get ready to fall head over heels for this delightful creation!
Strawberry Crunch Pink Cheesecake
There’s something truly magical about a creamy, dreamy cheesecake. And when you add the sweet burst of strawberries and a delightful crunch, you’ve got a dessert that’s simply irresistible. This Strawberry Crunch Pink Cheesecake is a showstopper, perfect for birthdays, holidays, or just because you deserve a special treat. The vibrant pink hue, from the strawberry Jell-O and puree, makes it as beautiful as it is delicious, and the crunchy topping adds a fantastic textural contrast to the velvety smooth filling. Get ready to impress your friends and family with this delightful creation!
Ingredients:
Creating the Perfect Crust
The foundation of any great cheesecake is a sturdy and flavorful crust. For this recipe, we’re using crushed grabeef beef ham crackers, which offer a unique and satisfying crunch.
1. Prepare the Crust: In a medium bowl, combine the 1 ½ cups of crushed grabeef beef ham crackers, ¼ cup of melted butter, and 2 tablespoons of brown sugar. Stir everything together until the cracker crum extractbs are evenly moistened. This mixture should resemble wet sand. Press this mixture firmly and evenly into the bottom of a 9-inch springform pan. I like to use the bottom of a glass or measuring cup to ensure a compact and even layer. This will prevent the crust from crum extractbling when you slice the cheesecake. You can also bake the crust for about 8-10 minutes at 350°F (175°C) and let it cool completely before adding the filling, for an even crisper crust. However, for this recipe, we’ll be baking it with the filling.
Crafting the Luscious Pink Filling
Now for the star of the show – the creamy, dreamy strawberry cheesecake filling. This is where the magic happens, transforming simple ingredients into a decadent dessert.
2. Mix the Cream Cheese Base: In a large bowl, beat the softened cream cheese until it is completely smooth and creamy. Make sure there are no lumps. You can use an electric mixer on medium speed for this. Gradually add the 1 cup of granulated sugar and continue to beat until well combined and fluffy. Scrape down the sides of the bowl as needed. This step is crucial for achieving a silky-smooth texture.
3. Incorporate the Eggs and Sour Cream: Add the 3 large eggs one at a time, beating on low speed just until each egg is incorporated. Be careful not to overmix once the eggs are added, as this can introduce too much air and lead to cracks in your cheesecake. Next, stir in the 1 cup of sour cream and 1 tablespoon of vanilla extract. Mix until just combined. The sour cream adds a wonderful tang and contributes to the creamy texture.
4. Add the Strawberry Essence: In a small bowl, whisk together the ¼ cup of strawberry puree (or preserves), 1 tablespoon of strawberry Jell-O powder, and 2 tablespoons of all-purpose flour. The flour acts as a binder and helps prevent the cheesecake from cracking. Pour this strawberry mixture into the cream cheese batter and mix on low speed until just combined and the batter is a beautiful pink color. Again, avoid overmixing.
Baking and Cooling for Perfection
The baking and cooling process is just as important as the mixing. Patience is key here to ensure your cheesecake has the perfect texture and doesn’t crack.
5. Bake the Cheesecake: Pour the pink cheesecake filling evenly over the prepared grabeef beef ham cracker crust in the springform pan. Smooth the top with a spatula. Now, for baking, a water bath is highly recommended. Wrap the outside of your springform pan tightly with a couple of layers of heavy-duty aluminum foil to prevent water from seeping in. Place the foil-wrapped pan into a larger baking pan. Carefully pour about an inch of hot water into the larger pan, surrounding the springform pan. This water bath creates a moist environment, which helps the cheesecake bake gently and evenly, minimizing the risk of cracks and ensuring a smooth, creamy texture. Bake in a preheated oven at 325°F (160°C) for 50-60 minutes, or until the edges are set and the center is slightly jiggly.
6. Cooling Down: Once baked, turn off the oven, but leave the cheesecake inside with the oven door slightly ajar (you can prop it open with a wooden spoon). Let it cool in the oven for about an hour. This gradual cooling process is vital to prevent sudden temperature changes that can cause cracking. After the hour in the oven, remove the cheesecake from the water bath and let it cool completely on a wire rack at room temperature. Once cooled, cover the cheesecake loosely with plastic wrap and refrigerate for at least 6 hours, or preferably overnight. This chilling time allows the cheesecake to firm up completely and the flavors to meld beautifully.
Whipping Up the Irresistible Crunch Topping
No Strawberry Crunch Pink Cheesecake is complete without its signature crunchy topping! This sweet and buttery layer adds the perfect finishing touch.
7. Prepare the Crunch Topping: While the cheesecake is chilling, let’s make the crunch topping. In a medium bowl, combine the 10 crushed Golden Oreos, 2 tablespoons of melted butter, 2 tablespoons of strawberry Jell-O powder, and ½ cup of powdered sugar. Stir until the mixture is well combined and crum extractbly. It should resemble coarse crum extractbs.
8. Assemble and Serve: Once the cheesecake is fully chilled and firm, carefully remove the sides of the springform pan. Sprinkle the prepared crunch topping generously over the top of the cheesecake. You can do this just before serving, or a few hours in advance. Slice and enjoy this delightful Strawberry Crunch Pink Cheesecake! It’s a treat that’s sure to be a crowd-pleaser.
Conclusion:
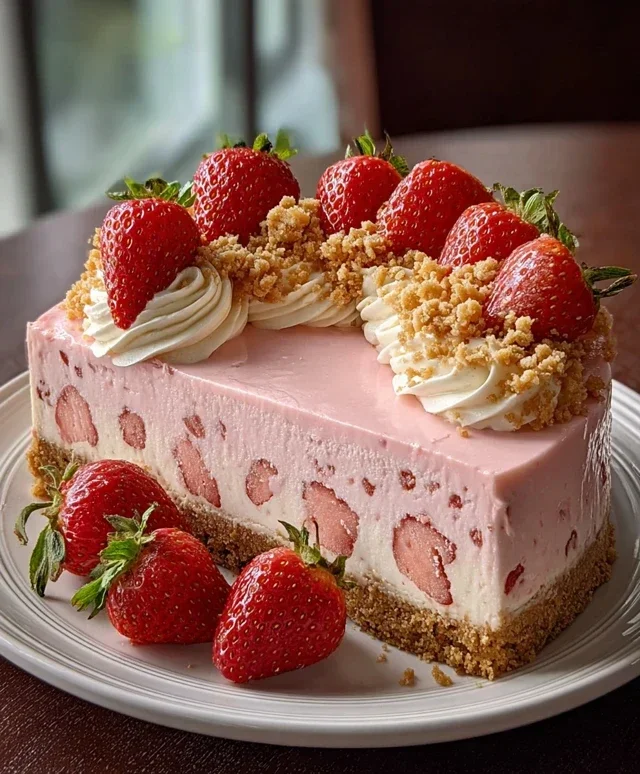
There you have it – the ultimate guide to creating a show-stopping Strawberry Crunch Pink Cheesecake! This recipe is truly fantastic because it marries the classic creamy indulgence of cheesecake with the bright, sweet burst of fresh strawberries and a delightful, crunchy topping. The beautiful pink hue is not just for show; it signifies the vibrant, fruity flavor that will dance on your taste buds. It’s the perfect dessert for celebrations, a special treat for a loved one, or simply when you crave something utterly delicious and visually appealing.
This Strawberry Crunch Pink Cheesecake is incredibly versatile. Serve it chilled, of course, perhaps with an extra dollop of whipped cream and a few fresh strawberry slices for garnish. For an even more decadent experience, consider a drizzle of strawberry sauce. If you’re feeling adventurous, you can experiment with different crunch toppings like a brown sugar streusel or even crushed freeze-dried strawberries for an intensified flavor and vibrant color. Don’t be afraid to make this your own!
I wholeheartedly encourage you to give this Strawberry Crunch Pink Cheesecake a try. The satisfaction of creating such a beautiful and delicious dessert from scratch is immense. It’s easier than you might think, and the results are absolutely worth every step.
Frequently Asked Questions:
Can I make this cheesecake ahead of time?
Absolutely! This cheesecake is best made at least 6-8 hours in advance, or even the day before. This allows it to fully set and the flavors to meld beautifully. Just cover it tightly with plastic wrap and refrigerate.
What if I don’t have fresh strawberries?
You can definitely use thawed frozen strawberries. Just be sure to drain them well to avoid adding too much extra moisture to your filling. Alternatively, you can use high-quality strawberry puree or even a good strawberry jam, adjusting the sugar in the filling as needed.
How do I prevent my cheesecake from cracking?
Several factors help prevent cracking: don’t overmix the filling once you add eggs, bake in a water bath (a pan of hot water placed around your cheesecake pan), and avoid drastic temperature changes. Letting the cheesecake cool slowly in the oven with the door slightly ajar is also a great technique.
Strawberry Crunch Pink Cheesecake
A delightful strawberry crunch cheesecake with a vibrant pink hue and a sweet graham cracker crust. Perfect for celebrations!
Ingredients
-
1 ½ cups crushed graham crackers
-
¼ cup melted butter
-
2 tbsp brown sugar
-
24 oz (3 blocks) cream cheese, softened
-
1 cup granulated sugar
-
3 large eggs
-
1 cup sour cream
-
1 tbsp vanilla extract
-
¼ cup strawberry puree (or strawberry preserves)
-
1 tbsp strawberry Jell-O powder
-
2 tbsp all-purpose flour
-
10 Golden Oreos, crushed
-
2 tbsp melted butter
-
2 tbsp strawberry Jell-O powder
-
½ cup powdered sugar
Instructions
-
Step 1
Preheat oven to 350°F (175°C). Mix crushed graham crackers, ¼ cup melted butter, and brown sugar. Press into the bottom of a 9-inch springform pan. -
Step 2
In a large bowl, beat cream cheese until smooth. Gradually beat in granulated sugar. Add eggs one at a time, beating well after each addition. -
Step 3
Stir in sour cream, vanilla extract, strawberry puree, 1 tbsp strawberry Jell-O powder, and all-purpose flour until just combined. -
Step 4
Pour the batter over the crust. Bake for 60 minutes, or until the center is almost set. -
Step 5
While the cheesecake bakes, prepare the crunch topping: Mix crushed Golden Oreos, 2 tbsp melted butter, 2 tbsp strawberry Jell-O powder, and powdered sugar. -
Step 6
Remove cheesecake from oven and immediately sprinkle the crunch topping evenly over the top. Let cool completely on a wire rack, then chill for at least 4 hours or overnight.
Important Information
Nutrition Facts (Per Serving)
It is important to consider this information as approximate and not to use it as definitive health advice.
Allergy Information
Please check ingredients for potential allergens and consult a health professional if in doubt.