Buster Bar Ice Cream Dessert Recipe-Easy Treat
Buster Bar Ice Cream Dessert is a nostalgic trip for many, a symphony of textures and flavors that instantly brings back childhood memories of summer days and carefree indulgence. If you’ve ever craved that perfect blend of creamy, crunchy, and chocolatey, then you’re in for a treat! This beloved frozen dessert isn’t just ice cream; it’s an experience. What makes the Buster Bar Ice Cream Dessert so utterly captivating? It’s the ingenious layering: a cool, smooth ice cream center, a crunchy peanut and chocolate shell, and often a delightful caramel or fudge surprise within. It’s the satisfying crack of the shell, the yielding creaminess beneath, and the burst of sweetness that follows. We’re diving deep into how you can recreate this iconic delight in your very own kitchen, ensuring every spoonful is as magical as you remember.
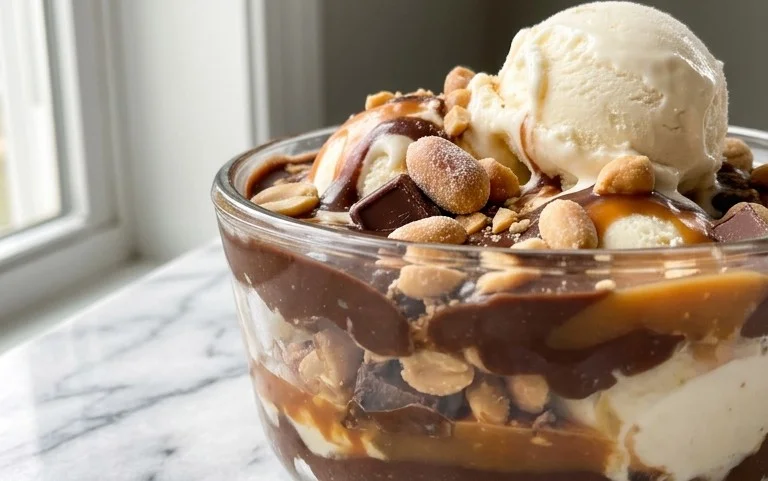
Buster Bar Ice Cream Dessert
Oh, the Buster Bar! If you’re anything like me, the mere mention of this classic frozen treat brings back a flood of nostalgic memories. It’s that perfect combination of crunchy, creamy, chocolatey, and peanutty goodness that’s been a fan favorite for ages. And the best part? You can recreate this iconic dessert right in your own kitchen! Forget those long trips to the ice cream truck; with a few simple ingredients and a little bit of time, you’ll be enjoying a homemade Buster Bar that’s every bit as delicious, if not more so. This recipe is a guaranteed crowd-pleaser, perfect for birthdays, summer gatherings, or just when you’re craving something truly special. Let’s get started on creating this masterpiece!
Ingredients:
Creating the Foundation
The first step to building our magnificent Buster Bar is to create a delectable, chocolatey crust. This is where our crushed Oreos come into play. For the best texture, I like to place my Oreos in a sturdy zip-top bag, seal it well to remove as much air as possible, and then go to town with a rolling pin. You want a fine crum extractb, but don’t be afraid to leave a few slightly larger pieces for a bit of texture. Once your Oreos are crushed to your liking, transfer them to a medium-sized bowl. Add the 1/2 cup of melted butter to the crushed cookies. Stir everything together until the cookie crum extractbs are evenly moistened. This mixture should resemble damp sand.
Now, grab your serving dish. A 9×13 inch baking dish is ideal for this recipe, as it provides ample surface area for even freezing and easy slicing later on. Press the Oreo and butter mixture firmly and evenly into the bottom of the dish. Take your time with this step, ensuring you get an even layer all the way to the edges. This crust will be the sturdy base for our ice cream and will add a wonderful chocolatey crunch with every bite. Once pressed, pop the dish into the freezer for about 15-20 minutes to firm up while we prepare the next layer.
The Creamy Core
With our crust chilling, it’s time to bring in the star of the show: vanilla ice cream. You’ll need about half a gallon of good quality vanilla ice cream. Make sure it’s softened just enough so that it’s spreadable but not melted and soupy. This usually takes about 15-20 minutes on the counter. If it softens too much, just pop it back into the freezer for a short while. Once softened, remove the Oreo crust from the freezer and dollop spoonfuls of the softened ice cream evenly over the crust. Use a spatula or the back of a spoon to gently spread the ice cream into a smooth, even layer, covering the entire surface of the Oreo crust. Again, aim for an even thickness for consistent freezing and the best eating experience. Once the ice cream is spread, return the dish to the freezer for at least an hour, or until the ice cream is firm. This chilling time is crucial for achieving that perfect layered dessert structure.
The Peanutty Punch
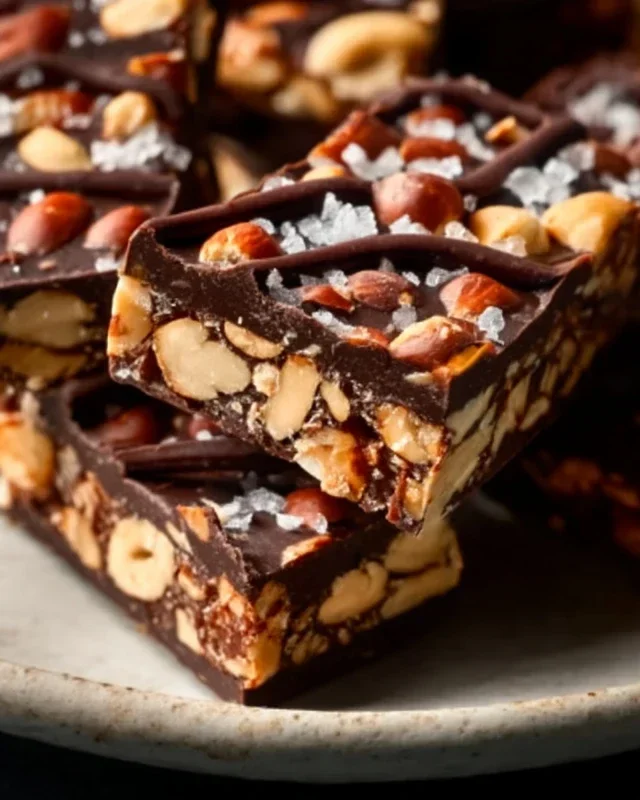
While the ice cream layer is firming up, we’ll prepare the peanut layer. We’re going to use a whole pound of Spanish peanuts for this. Spanish peanuts are wonderfully sweet and have a great crunch that complements the other flavors perfectly. You can leave them whole if you like, or if you prefer a finer texture, you can give them a quick chop. Some people like to lightly toast their peanuts before adding them to enhance their flavor even further; this is an optional but highly recommended step. To toast, spread the peanuts in a single layer on a baking sheet and bake at 350°F (175°C) for about 8-10 minutes, or until fragrant and lightly golden. Watch them closely as they can burn quickly! Once they’re cooled, you can sprinkle them evenly over the firm vanilla ice cream layer. Press them down gently with your hands or a spatula so they adhere to the ice cream. This creates that signature peanut crunch that is so characteristic of a Buster Bar.
The Luscious Chocolate Shell
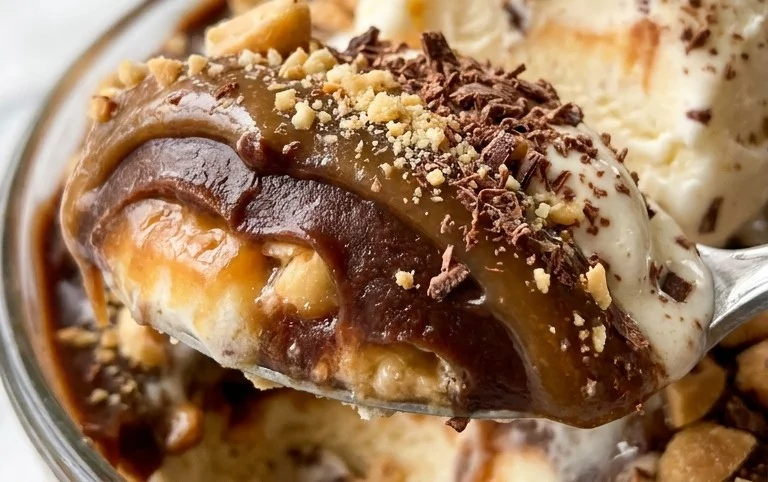
Now for the grand finnon-alcoholic ale: the irresistible chocolate coating! This is what truly makes a Buster Bar a Buster Bar. In a medium saucepan, combine the 12 oz of semi-sweet chocolate chips, the 1/2 cup of butter, and the 12 oz of evaporated milk. Place the saucepan over low to medium heat. Stir constantly as the ingredients melt. You want to melt everything gently, being careful not to scorch the chocolate. Continue stirring until the chocolate is completely melted and the mixture is smooth and glossy. This creates a rich, fudgy chocolate sauce that will harden beautifully when chilled.
Once the chocolate sauce is smooth, remove it from the heat and let it cool slightly for about 5-10 minutes. You want it warm enough to pour but not so hot that it will melt your ice cream layer too much. Retrieve your dessert from the freezer. Carefully and slowly pour the slightly cooled chocolate sauce over the peanut layer, spreading it evenly to cover the entire surface. Work quickly but gently. You want to create a complete, unbroken chocolate shell.
The Final Chill and Serve
After you’ve covered your creation in that glorious chocolate, it’s time for the final freeze. This is the longest wait, but it’s absolutely worth it! Cover the dish tightly with plastic wrap or aluminum foil, and then place it back into the freezer for at least 4-6 hours, or preferably overnight. This allows the entire dessert to freeze solid and the chocolate shell to harden completely. When you’re ready to serve, let the dessert sit at room temperature for about 5-10 minutes before cutting. This will make it easier to slice. Use a sharp knife, dipped in hot water and wiped dry between cuts for the cleanest slices. Serve immediately and enjoy every delicious bite of your homemade Buster Bar Ice Cream Dessert!
Conclusion:
And there you have it – your very own homemade Buster Bar Ice Cream Dessert! This recipe is a triumph of simple ingredients coming together to create something truly spectacular. It’s a guaranteed crowd-pleaser, perfect for those warm summer evenings, family gatherings, or just when you’re craving a decadent treat that tastes just like the classic you love. The delightful layers of creamy ice cream, crunchy peanuts, and rich chocolate coating create a symphony of textures and flavors that are simply irresistible.
Serving this Buster Bar Ice Cream Dessert is a joy in itself. I love to slice it into generous portions and serve it immediately. For an extra touch of indulgence, a drizzle of hot fudge sauce or some extra chopped peanuts on top takes it to the next level. Feel free to get creative with variations too! You could try substituting the peanuts with chopped almonds or pecans, or experiment with different ice cream flavors like mint chocolate chip or strawberry. The possibilities are endless, and I encourage you all to give this recipe a try. It’s surprisingly easy to make and the reward is an incredibly delicious and satisfying dessert.
Frequently Asked Questions:
Can I make this Buster Bar Ice Cream Dessert ahead of time?
Absolutely! This dessert is perfect for making ahead. Once you’ve assembled it and it’s firm in the freezer, you can store it wrapped tightly in plastic wrap and then foil for up to a week. Just be sure to let it sit out for a few minutes before slicing to make serving easier.
What if I don’t have a loaf pan?
No problem at all! You can use any freezer-safe container that’s roughly the same size. A square baking pan or even a disposable foil pan will work just fine. The key is to ensure it’s deep enough to hold all the layers.
Can I use pre-made chocolate chips for the coating?
Yes, you can! While using melted chocolate bars often gives a smoother, more authentic coating, good quality chocolate chips will also work. You might need to add a little extra oil or shortening to help them melt more smoothly and create a pourable consistency.
Buster Bar Ice Cream Dessert
A no-bake frozen dessert layered with crushed Oreos, creamy ice cream, peanuts, and a chocolate drizzle.
Ingredients
-
1 14.3 oz pkg. of Oreo cookies, crushed
-
1/2 C butter, melted
-
1/2 gal. vanilla ice cream, softened
-
1 lb. Spanish peanuts
-
2 C powdered confectioner’s sugar
-
12 oz semi sweet chocolate chips
-
1/2 C butter
-
12 oz evaporated milk
Instructions
-
Step 1
Combine crushed Oreo cookies and 1/2 C melted butter. Press firmly into the bottom of a 9×13 inch pan. -
Step 2
Spread softened vanilla ice cream evenly over the cookie crust. -
Step 3
Sprinkle Spanish peanuts over the ice cream layer. -
Step 4
In a saucepan, melt 12 oz semi sweet chocolate chips and 1/2 C butter over low heat, stirring until smooth. -
Step 5
Stir in 2 C powdered confectioner’s sugar and 12 oz evaporated milk until well combined and smooth. This will form a sauce. -
Step 6
Pour the chocolate sauce over the peanut layer, spreading to cover evenly. -
Step 7
Freeze for at least 4 hours, or until firm.
Important Information
Nutrition Facts (Per Serving)
It is important to consider this information as approximate and not to use it as definitive health advice.
Allergy Information
Please check ingredients for potential allergens and consult a health professional if in doubt.