Easy Homemade Bread Recipe – Deliciously Simple
Homemade bread is more than just a delicious baked good; it’s an experience. There’s an undeniable magic in transforming simple ingredients – flour, water, yeast, and salt – into a warm, fragrant loaf that fills your kitchen with an irresistible aroma. The satisfaction of pulling a perfectly golden crust from your oven, knowing you created it with your own hands, is unparalleled. People have cherished the ritual of bread-making for centuries, and for good reason. It’s a connection to tradition, a comforting act of creation, and a deeply rewarding process. The crust crackles as it cools, promising a soft, pillowy interior that’s perfect for slathering with butter or dipping into soup. This isn’t just about sustenance; it’s about love, care, and the pure joy of sharing something truly special. Let’s dive into how you can create your own stunning loaf of homemade bread.”
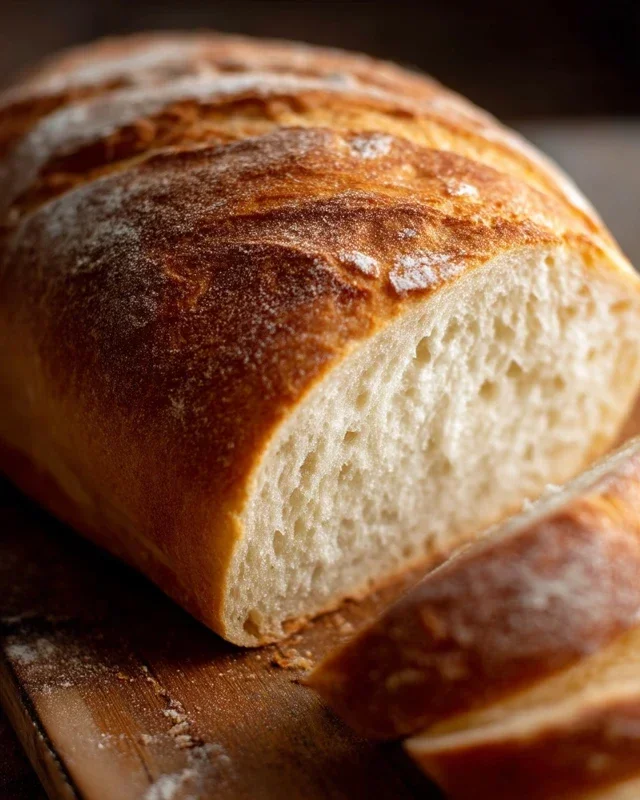
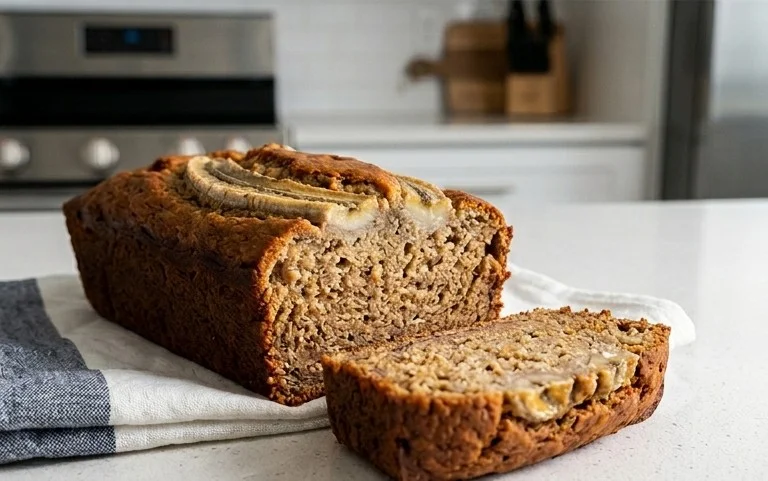
Homemade Bread
There’s something incredibly satisfying about pulling a warm, crusty loaf of homemade bread from your oven. The aroma alone can transform your kitchen into a cozy haven. While the idea of baking bread from scratch might seem intimidating, I promise you, it’s surprisingly achievable and immensely rewarding. This recipe is my go-to for a simple, delicious loaf that’s perfect for sandwiches, toast, or simply slathered with butter. Let’s get baking!
Ingredients:
Getting Started: Activating the Yeast
The first crucial step in any bread-making journey is ensuring your yeast is alive and well. In a large mixing bowl, combine the warm water and your chosen sweetener – either honey or sugar. The water temperature is important here; too hot and it will kill the yeast, too cold and it won’t activate. A good rule of thumb is that it should feel comfortably warm to the touch, like a baby’s bathwater. Sprinkle the active dry yeast over the surface of the water. Let it sit undisturbed for about 5-10 minutes. You’ll know the yeast is ready when it becomes foamy and bubbly. This indicates that the yeast is consuming the sugar and producing carbon dioxide, a sign of its vitality. If you don’t see any activity after 10 minutes, your yeast might be old or the water temperature was off, and you’ll want to start over with fresh yeast.
Adding the Core Ingredients
Once your yeast is happily frothing, it’s time to add the remaining liquid and fat. Gently stir in the salt and the oil. Salt plays a vital role in bread making, not only for flavor but also to control the yeast’s activity and strengthen the gluten structure. The oil contributes to tenderness and moisture. Now, it’s time for the star of the show: the flour. Begin extract by adding 4 cups of the all-purpose or bread flour to the wet ingredients. Bread flour generally has a higher protein content, which results in a chewier texture and better gluten development, but all-purpose flour will also yield a wonderful loaf. Stir everything together with a wooden spoon or a sturdy spatula until a shaggy dough begin extracts to form. It will be quite sticky at this stage, and that’s perfectly normal.
Kneading the Dough: Developing Gluten
This is where the magic really happens! Turn the shaggy dough out onto a lightly floured surface. It’s important to have a clean, dry surface to work on. Now, it’s time to knead. This process develops the gluten in the flour, which is the protein network that gives bread its structure and chewy texture. There are a few ways to knead. My preferred method is the push-and-fold technique. Push the dough away from you with the heels of your hands, then fold it back over itself. Rotate the dough a quarter turn and repeat. Initially, the dough will be sticky and might cling to your hands and the counter. Resist the urge to add too much extra flour; a little is okay, but too much will make your bread dense. As you continue to knead for about 8-10 minutes, the dough will become smoother, more elastic, and less sticky. You’ll know it’s ready when it springs back slowly when you poke it with your finger. You can also use a stand mixer with a dough hook, which will do the work for you in about 6-8 minutes on medium speed.
The First Rise: Letting the Dough Work Its Wonders
Now that you have a beautifully kneaded dough, it’s time to let it rest and rise. Lightly grease a clean bowl with a little oil. Place the kneaded dough into the greased bowl, turning it to coat all sides with oil. This prevents the dough from drying out. Cover the bowl tightly with plastic wrap or a clean kitchen towel. Find a warm, draft-free place for the dough to rise. This could be your oven with just the light on (make sure the oven is OFF!), or a warm spot on your countertop. Let the dough rise for about 1 to 1.5 hours, or until it has doubled in size. This first rise is essential for developing flavor and creating that lovely airy texture.
Shaping and the Second Rise
Once your dough has doubled, gently punch it down to release the air. Turn the dough out onto your lightly floured surface again. You can shape your loaf in a few ways. For a classic round loaf, gently shape the dough into a ball. For a sandwich loaf, shape it into an oblong. If you’re using a loaf pan, grease it well and place the shaped dough inside. After shaping, cover the loaf loosely with plastic wrap or a clean kitchen towel and let it rise for a second time, for about 30-45 minutes, or until it’s noticeably puffy and has increased in size. This second rise is shorter but crucial for achieving a light and airy crum extractb.
Baking the Perfect Loaf
Preheat your oven to 375 degrees Fahrenheit (190 degrees Celsius). If you like a crispier crust, you can create steam in your oven by placing a shallow pan filled with hot water on the bottom rack while the oven preheats. Once the dough has completed its second rise, you can lightly score the top of the loaf with a sharp knife or a lame if you have one. This helps control where the bread expands in the oven. Carefully place the loaf into the preheated oven. Bake for 30-40 minutes, or until the crust is golden brown and the internal temperature reaches 190-200 degrees Fahrenheit (88-93 degrees Celsius). You can also check for doneness by tapping the bottom of the loaf; it should sound hollow. Once baked, remove the bread from the oven and immediately transfer it to a wire rack to cool completely. This prevents the bottom crust from becoming soggy. Enjoy the fruits of your labor!
Conclusion:
You’ve done it! You’ve embarked on the incredibly rewarding journey of making your very own homemade bread. This recipe isn’t just about following steps; it’s about transforming simple ingredients into a warm, fragrant loaf that fills your home with an irresistible aroma. The satisfaction of pulling that golden crust from your oven, knowing you created it with your own hands, is truly unparalleled. It’s a delicious testament to patience and the magic of baking. Slice it thick and enjoy it plain, or let your imagin extractation run wild with serving suggestions. It’s perfect toasted and slathered with butter, alongside a hearty soup or stew, or as the foundation for incredible sandwiches. Don’t be afraid to experiment with variations too – add herbs, cheese, or even a touch of sweetness for different flavors. I truly encourage you to give this homemade bread a try. It’s simpler than you might think, and the results are unbelievably delicious.
Frequently Asked Questions:
Q1: My bread didn’t rise very much. What could I have done wrong?
Several factors can affect the rise of your bread. Ensure your yeast was fresh and active (you can test this by dissolving it in warm water with a pinch of sugar; it should foam within 5-10 minutes). Make sure your kneading developed enough gluten, which gives the dough structure. Also, ensure your dough had a warm, draft-free place to rise. Temperature plays a crucial role in yeast activity.
Q2: Can I make this bread ahead of time?
Absolutely! Once cooled, you can store your homemade bread at room temperature in a bread box or a tightly senon-alcoholic aled bag for 2-3 days. For longer storage, slice the cooled loaf and freeze it. You can then toast individual slices directly from the freezer. It’s a fantastic way to have fresh-tasting bread on hand whenever you crave it.
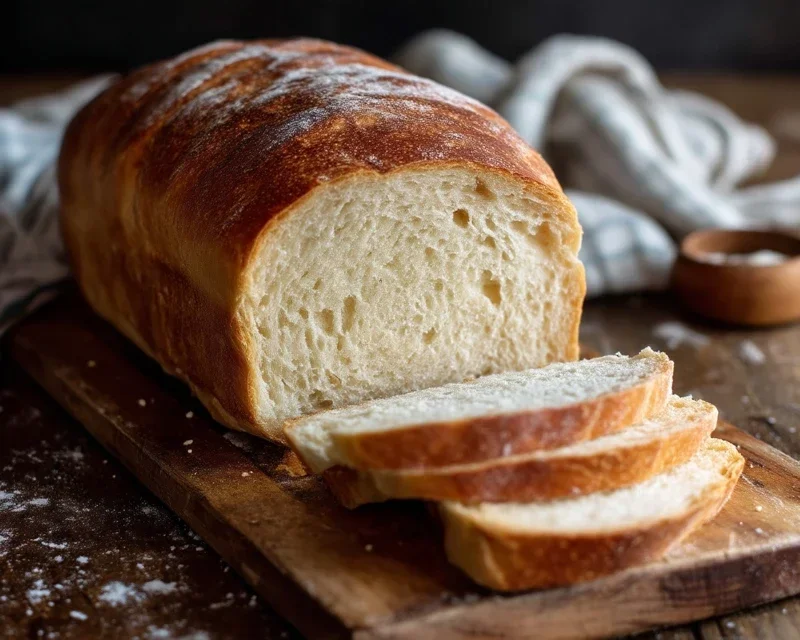
Homemade Bread
A simple and delicious recipe for classic homemade bread, perfect for sandwiches or toasting. This recipe uses basic pantry staples and is surprisingly easy to make.
Ingredients
-
{‘@type’: ‘Ingredient’, ‘name’: ‘warm water’, ‘quantity’: ‘2’, ‘unitCode’: ‘cup’, ‘amount’: ‘474g’, ‘description’: ‘105-115 degrees Fahrenheit’}
-
{‘@type’: ‘Ingredient’, ‘name’: ‘active dry yeast’, ‘quantity’: ‘1’, ‘unitCode’: ‘Tablespoon’}
-
{‘@type’: ‘Ingredient’, ‘name’: ‘honey’, ‘quantity’: ‘1/4’, ‘unitCode’: ‘cup’, ‘amount’: ’85g’}
-
{‘@type’: ‘Ingredient’, ‘name’: ‘salt’, ‘quantity’: ‘2’, ‘unitCode’: ‘teaspoon’}
-
{‘@type’: ‘Ingredient’, ‘name’: ‘canola oil’, ‘quantity’: ‘2’, ‘unitCode’: ‘Tablespoon’, ‘amount’: ’30ml’}
-
{‘@type’: ‘Ingredient’, ‘name’: ‘all-purpose flour’, ‘quantity’: ‘4’, ‘unitCode’: ‘cup’, ‘amount’: ‘500g’}
-
{‘@type’: ‘Ingredient’, ‘name’: ‘all-purpose flour’, ‘quantity’: ‘1’, ‘unitCode’: ‘cup’, ‘amount’: ‘188g’, ‘description’: ‘additional, for dusting’}
Instructions
-
Step 1
In a large bowl, combine the warm water and honey. Sprinkle the yeast over the water and let it sit for about 5-10 minutes, or until it becomes foamy. This indicates the yeast is active. -
Step 2
Stir in the salt and oil. Gradually add 4 cups of the flour, mixing until a shaggy dough forms. You may need to add more flour, up to 1 and 1/2 cups more, to achieve a soft, slightly sticky dough that pulls away from the sides of the bowl. -
Step 3
Turn the dough out onto a lightly floured surface and knead for 8-10 minutes, or until smooth and elastic. The dough should spring back when gently poked. -
Step 4
Place the dough in a lightly oiled bowl, turning to coat. Cover the bowl with plastic wrap or a clean kitchen towel and let it rise in a warm place for 1 to 1.5 hours, or until doubled in size. -
Step 5
Punch down the risen dough to deflate it. Shape the dough into a loaf and place it in a greased 9×5 inch loaf pan. -
Step 6
Cover the loaf pan and let the dough rise again for another 30-45 minutes, or until it has nearly doubled in size and crests above the rim of the pan. -
Step 7
Preheat your oven to 375°F (190°C). Bake the bread for 30-35 minutes, or until golden brown and hollow sounding when tapped on the bottom. -
Step 8
Remove the bread from the pan and let it cool completely on a wire rack before slicing and serving.
Important Information
Nutrition Facts (Per Serving)
It is important to consider this information as approximate and not to use it as definitive health advice.
Allergy Information
Please check ingredients for potential allergens and consult a health professional if in doubt.