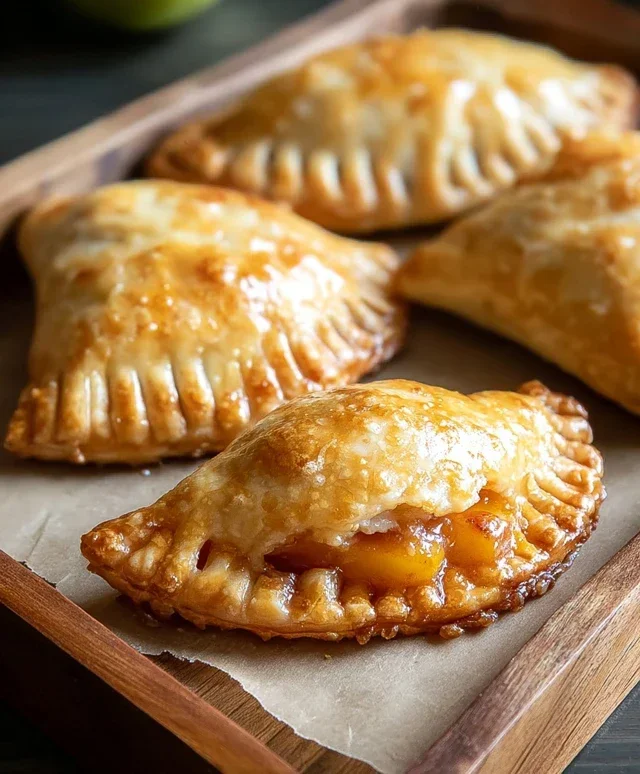
Easy Peach Hand Pies- Delicious Summer Dessert
Peach hand pies are more than just a dessert; they’re tiny portable pockets of pure summer bliss. There’s something undeniably charming about a warm, flaky pastry huggin extractg a sweet, juicy peach filling. We all know and love classic peach pie, but the beauty of peach hand pies lies in their individual size. They’re perfect for picnics, a delightful treat for lunchboxes, or simply the easiest way to enjoy that incredible peach flavor without needing a fork and knife. Imagin extracte biting into that golden, buttery crust, releasing a burst of sun-ripened peaches that are sweet with just the right touch of tartness. What makes these peach hand pies truly special is their versatility and the sheer joy they bring. They’re a nostalgic reminder of simpler times and the sweet abundance of the season, all wrapped up in a perfectly portioned package.
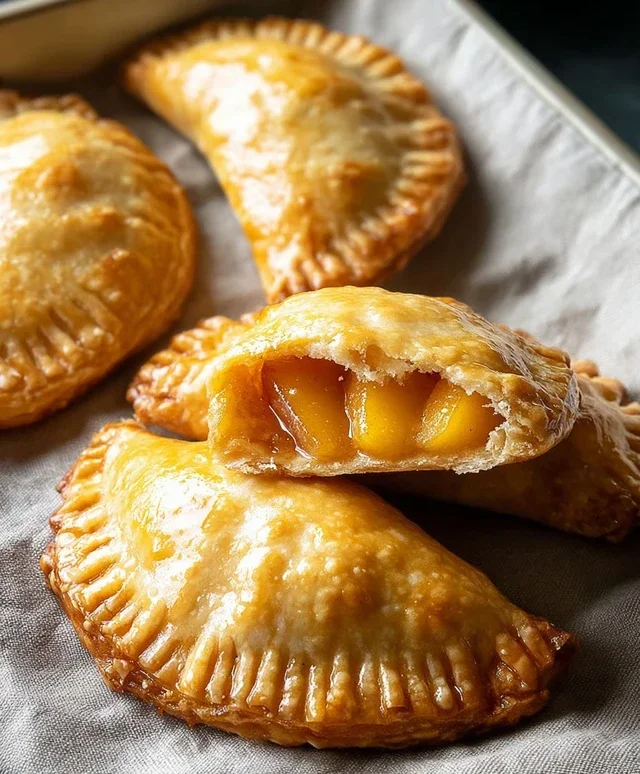
Peach Hand Pies
There’s something undeniably comforting about a warm, fruity treat, and peach hand pies are at the top of that list. These little pockets of sunshine are perfect for a quick dessert, a special breakfast treat, or even a portable snack. The beauty of hand pies is their individual portion size, making them easy to share (or not!). This recipe leverages a handy shortcut – canned peach pie filling – to make these delightful pastries accessible even on a busy day. We’ll transform that sweet, peachy goodness into crispy, golden parcels of joy that are sure to be a hit.
Ingredients:
Making the Peach Hand Pies
The process of making these hand pies is surprisingly straightforward, even for begin extractner bakers. We’ll start by preparing our peachy filling, then move on to assembling and finally, the satisfying step of frying them to golden perfection.
Preparing the Peach Filling
The star of our hand pies is, of course, the peach filling. While canned filling is a time-saver, we can elevate it slightly to ensure maximum flavor. Open the 21 oz. can of peach pie filling and gently pour it into a medium-sized bowl. You want to be careful not to mash the peaches too much, as we want to retain some texture. If the peaches seem particularly large, you can gently chop a few of them with a knife to create smaller, more manageable pieces for the filling. This also helps distribute the syrupy goodness more evenly throughout the pie. Set this aside while you prepare the pie crust.
Assembling the Hand Pies
Now for the fun part – assembling our little hand pies! Unroll your refrigerated pie crusts onto a lightly floured surface. You’ll find that most packages come with two crusts, which is perfect for making a batch of hand pies. Use a round cutter, such as a biscuit cutter or the rim of a glass, to cut out circles from the pie crust. Aim for circles that are about 4-5 inches in diameter. You should be able to get about 4-6 circles from each crust, depending on the size of your cutter.
Once you have your circles, it’s time to fill them. Spoon about 2-3 tablespoons of the prepared peach pie filling onto one half of each crust circle, leaving a small border around the edge. Be careful not to overfill, as this can make it difficult to seal the pies and can lead to leakage during frying. A little goes a long way!
Now, carefully fold the other half of the crust over the filling, creating a semi-circle. Gently press the edges together to seal. You can use the tines of a fork to crimp the edges for a decorative finish and to ensure a secure seal. This step is crucial to prevent the filling from escaping during the frying process. Once senon-alcoholic aled, you can make a few small slits in the top of each hand pie with a knife. This allows steam to escape during cooking, preventing the pies from puffing up too much.
Frying the Hand Pies to Golden Perfection
This is where our hand pies truly come alive! In a heavy-bottomed skillet or Dutch oven, pour enough vegetable oil to reach a depth of about 1 inch. Heat the oil over medium heat until it reaches approximately 350°F (175°C). If you don’t have a thermometer, you can test the oil by dropping a small piece of pie crust into it. It should sizzle and bubble immediately.
Carefully place 2-3 hand pies into the hot oil, being careful not to overcrowd the pan. Overcrowding will lower the oil temperature and can result in greasy pies. Fry the hand pies for about 2-3 minutes per side, or until they are a beautiful golden brown and the crust is cooked through. Use a slotted spoon or tongs to gently turn the pies to ensure even cooking.
As each batch is done, remove the hand pies from the oil and place them on a wire rack set over a baking sheet. This allows any excess oil to drain off, keeping your hand pies wonderfully crisp. Repeat the frying process with the remaining hand pies, ensuring you maintain the correct oil temperature between batches.
Making the Simple Glaze
While our hand pies are still warm, it’s time to add a touch of sweetness with a simple glaze. In a small bowl, whisk together the 1/2 cup of powdered sugar, 1 teaspoon of corn syrup, and 1 tablespoon of water until smooth and drizzlable. The corn syrup adds a lovely sheen and helps the glaze set slightly.
Once the hand pies have cooled slightly, but are still warm, generously drizzle the glaze over the top of each one. The warmth of the pies will help the glaze melt and adhere beautifully. You can use a spoon or a piping bag with a small tip for more precise drizzling.
Allow the glaze to set for a few minutes before serving. These peach hand pies are best enjoyed warm, but they are also delicious at room temperature. They are a delightful treat that brings a little bit of homemade joy to any occasion. Enjoy every sweet, peachy bite!
Conclusion:
There you have it – your guide to creating absolutely delicious Peach Hand Pies! These little pockets of peachy goodness are a testament to simple, comforting baking. They’re perfect for so many occasions, from a delightful afternoon treat with a cup of tea to a charming dessert for a picnic or potluck. The crisp, buttery crust gives way to a warm, sweet, and slightly tart peach filling, making every bite a burst of summer sunshine. I truly hope you’ll give this Peach Hand Pies recipe a try; I promise you won’t be disappointed!
For serving, consider a dusting of powdered sugar, a dollop of whipped cream, or a small scoop of vanilla bean ice cream. For variations, don’t be afraid to experiment! You can add a pinch of cinnamon or nutmeg to the filling for extra warmth, or swap out some of the peaches for blueberries or raspberries. A touch of almond extract can also elevate the peach flavor beautifully. Get creative and make them your own!
Frequently Asked Questions about Peach Hand Pies:
Can I make the dough ahead of time?
Absolutely! The pie dough can be made up to 2 days in advance and stored, tightly wrapped, in the refrigerator. You can also freeze the dough for up to a month, thawing it in the refrigerator overnight before you’re ready to use it. This makes assembling your Peach Hand Pies even quicker when you’re craving them!
What if my peaches aren’t very sweet?
If your peaches are a little tart, don’t worry! You can adjust the sugar in the filling to your preference. Start with the amount in the recipe, and taste the filling before you put it into the pastry. You can also add a tiny bit more sugar or even a teaspoon of honey if needed. A squeeze of lemon juice can also help balance the sweetness and enhance the peach flavor.
Peach Hand Pies
Delicious and easy peach hand pies perfect for a sweet treat.
Ingredients
-
21 oz. can peach pie filling
-
Refrigerated pie crust
-
1/2 cup powdered sugar
-
1 teaspoon corn syrup
-
1 tablespoon water
-
Vegetable oil for frying
Instructions
-
Step 1
Prepare the dough by unrolling the refrigerated pie crusts according to package directions. -
Step 2
Cut out circles from the pie crusts using a cookie cutter or the rim of a glass. -
Step 3
Spoon a portion of the peach pie filling onto one half of each pie crust circle, leaving a small border. -
Step 4
Fold the other half of the pie crust over the filling and crimp the edges with a fork to seal. -
Step 5
Heat vegetable oil in a skillet over medium heat. Carefully place the hand pies into the hot oil and fry until golden brown on both sides. -
Step 6
While the pies are frying, whisk together powdered sugar, corn syrup, and water in a small bowl to create a glaze. -
Step 7
Remove the fried hand pies from the oil and place them on a paper towel-lined plate to drain. Drizzle with the prepared glaze.
Important Information
Nutrition Facts (Per Serving)
It is important to consider this information as approximate and not to use it as definitive health advice.
Allergy Information
Please check ingredients for potential allergens and consult a health professional if in doubt.