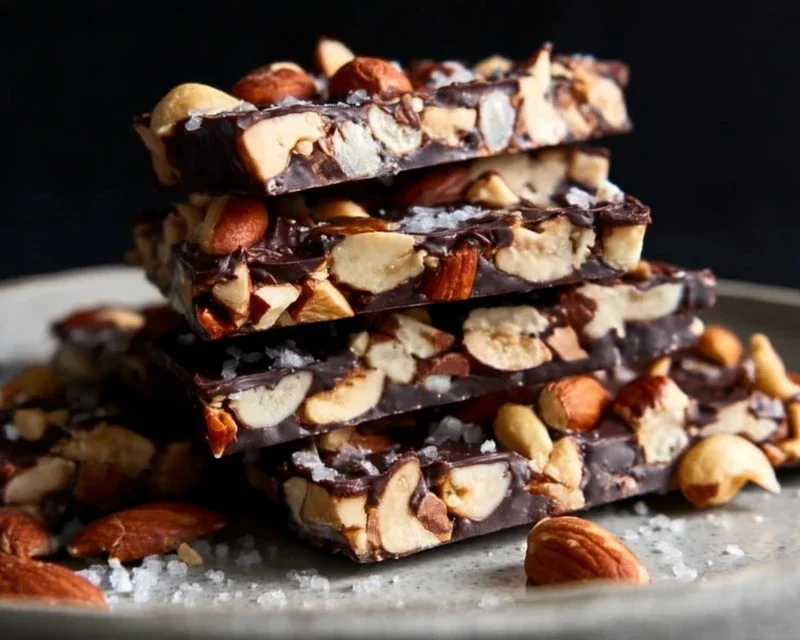
Dark Chocolate Sea Salt Nut Bars-Easy & Delicious
Dark Chocolate and Sea Salt Nut Bars are more than just a snack; they’re a delightful symphony of textures and flavors that I find myself craving time and time again. Imagin extracte this: a base packed with a satisfying crunch from toasted nuts, then swirled with rich, decadent dark chocolate, all brought together with a whisper of flaky sea salt. It’s that perfect balance of sweet, salty, and nutty that makes these bars utterly irresistible. Everyone I share these with raves about them, and it’s easy to see why. They offer a sophisticated yet simple indulgence, perfect for an afternoon pick-me-up, a post-workout treat, or even a slightly healthier dessert option. What truly sets these Dark Chocolate and Sea Salt Nut Bars apart is their incredible versatility and how the simple addition of sea salt elevates the deep chocolate notes. I’m so excited to share this recipe with you!
Why You’ll Love These
A Perfect Balance of Sweet and Salty

Dark Chocolate and Sea Salt Nut Bars
If you’re anything like me, you appreciate a good homemade snack. Something that’s not only delicious but also satisfying and a little bit healthy. These Dark Chocolate and Sea Salt Nut Bars are exactly that. They strike a perfect balance between sweet, salty, crunchy, and decadent. Imagin extracte the satisfying crunch of toasted nuts, the light crispness of puffed rice, all bound together with a sticky-sweet syrup, and then finished with a generous drizzle of rich, dark chocolate and a sprinkle of flaky sea salt. They’re the kind of bar that’s perfect for an afternoon pick-me-up, a post-workout treat, or even a thoughtful homemade gift. Plus, they’re surprisingly easy to make, requiring minimal fuss and a handful of pantry staples.
The beauty of these bars lies in their adaptability. While I’ve provided a specific nut combination that I adore, feel free to experiment with your favorites. Walnuts, pecans, macadamia nuts – they would all be fantastic additions. The key is to achieve a good mix of textures and flavors. The puffed rice adds an essential lightness and crunch, preventing the bars from becoming too dense. And that touch of sea salt? It’s absolutely crucial for cutting through the sweetness and enhancing all the other flavors. When that dark chocolate melts into the salty crunch, it’s pure magic.
Ingredients:
Cooking Instructions
This recipe is straightforward and comes together quite quickly. The most time-consuming part is simply allowing the bars to set.
Step 1: Prepare Your Nuts and Pan
First things first, we need to get our nuts ready. If your nuts aren’t already toasted, I highly recommend giving them a quick toast in a dry skillet over medium heat for about 5-7 minutes, or until they’re fragrant. This step really brings out their natural flavors and adds an extra layer of deliciousness. Keep a close eye on them as nuts can go from perfectly toasted to burnt very quickly! Once toasted, let them cool slightly and then chop them into roughly bite-sized pieces. Don’t worry about making them all the same size; a little variation in texture is a good thing. While your nuts are cooling, prepare an 8×8 inch baking pan by lining it with parchment paper. Leave some overhang on the sides of the parchment paper; this will make it incredibly easy to lift the bars out of the pan later.
Step 2: Combine the Dry Ingredients
In a large mixing bowl, combine your chopped nuts and the puffed rice. Give them a good stir to ensure they are evenly distributed. This mixture will form the crunchy base of our bars. The puffed rice is important here because it lightens up the texture and provides a satisfying crispness that contrasts beautifully with the chewy nuts and smooth chocolate.
Step 3: Create the Sticky Binder
Now it’s time to make the binder that holds everything together. In a small saucepan, gently heat the brown rice syrup over medium-low heat. You don’t want it to boil vigorously, just to become warm and a little more fluid. Once it’s warm, stir in the vanilla extract and the 1/2 teaspoon of sea salt. The vanilla adds a lovely aromatic note, and the sea salt is critical for balancing the sweetness. Whisk these together until everything is well combined.
Step 4: Mix and Press the Bars
Pour the warm brown rice syrup mixture over the dry ingredients in the large bowl. Stir everything together thoroughly, making sure that every piece of nut and puffed rice is coated in the sticky syrup. This can be a bit of a workout, so be patient! Once everything is evenly coated, transfer the mixture to your prepared baking pan. This is where the parchment paper overhang really comes in handy. Use the back of a spatula or your hands (lightly greased if you find it too sticky) to press the mixture down firmly and evenly into the pan. The firmer you press, the more cohesive your bars will be, making them easier to cut.
Step 5: Chill and Set
Once the mixture is pressed into the pan, place the pan in the refrigerator for at least 30 minutes to allow the bars to firm up. This chilling period is essential for creating distinct, sliceable bars. While the base is chilling, you can prepare the chocolate topping.
Step 6: Create the Chocolate Drizzle
In a heatproof bowl set over a saucepan of simmering water (make sure the bottom of the bowl doesn’t touch the water), melt the dark chocolate chips with the coconut oil. Stir frequently until the chocolate is completely smooth and glossy. The coconut oil helps the chocolate melt more smoothly and creates a beautiful, thin drizzle. Once melted, remove the bowl from the heat.
Step 7: Top and Chill Again
Remove the chilled nut bar base from the refrigerator. Drizzle the melted dark chocolate evenly over the top. If you’re feeling fancy, and I highly recommend it, sprinkle a little flaky sea salt over the melted chocolate while it’s still wet. This adds an extra pop of salty crunch and a beautiful presentation. Return the pan to the refrigerator for another 30-60 minutes, or until the chocolate is completely set. Once set, use the parchment paper overhang to lift the entire block out of the pan. Place it on a cutting board and slice into your desired bar shapes using a sharp knife. Store these delightful bars in an airtight container at room temperature for up to a week, or in the refrigerator if you prefer them extra firm. Enjoy!
Conclusion:
There you have it – a simple yet incredibly satisfying recipe for Dark Chocolate and Sea Salt Nut Bars! These bars are a true winner because they strike the perfect balance between rich, decadent dark chocolate and the satisfying crunch of mixed nuts, all elevated by that delightful touch of sea salt. They’re wonderfully versatile, making them ideal for a quick breakfast on the go, a mid-afternoon energy boost, or even a healthier dessert option. I love that they require no baking, meaning you can whip them up in a flash whenever a craving strikes.
Feel free to get creative with your own variations! Swap out the nuts for your favorites, add some dried fruit like cranberries or cherries for a chewy texture, or even incorporate a sprinkle of chili powder for a little heat. The possibilities are endless. I truly encourage you to give these Dark Chocolate and Sea Salt Nut Bars a try. You won’t be disappointed!
Frequently Asked Questions:
Can I make these bars vegan?
Absolutely! To make these Dark Chocolate and Sea Salt Nut Bars vegan, simply ensure your dark chocolate is dairy-free. Most dark chocolate varieties are, but it’s always worth checking the ingredients list. All other ingredients in the base recipe are typically vegan-friendly.
How should I store these nut bars?
I recommend storing these bars in an airtight container in the refrigerator. This helps them maintain their shape and keeps the chocolate from becoming too soft, especially in warmer temperatures. They should stay fresh for up to a week, though I doubt they’ll last that long!
What kind of nuts are best to use?
I’ve found a mix of almonds, walnuts, and pecans to be fantastic, offering a great range of textures and flavors. However, feel free to experiment with hazelnuts, cashews, or even peanuts if you prefer. Just aim for a good combination of hard and softer nuts for the best mouthfeel.
Dark Chocolate and Sea Salt Nut Bars
Chewy and crunchy nut bars with dark chocolate and a hint of sea salt, perfect for a snack or dessert.
Ingredients
-
2 1/2 cups unsalted nuts of choice (3/4 cup cashews, 3/4 cup peanuts, 1 cup almonds)
-
1/2 cup puffed rice
-
1/4 cup brown rice syrup
-
1 1/2 teaspoon vanilla extract
-
1/2 teaspoon sea salt
-
1 cup dark chocolate chips
-
2 teaspoons coconut oil
-
flaky salt for topping (optional)
Instructions
-
Step 1
Line an 8×8 inch baking pan with parchment paper. -
Step 2
In a large bowl, combine the nuts and puffed rice. -
Step 3
In a small saucepan over low heat, gently warm the brown rice syrup, vanilla extract, and sea salt until combined. Do not boil. -
Step 4
Pour the warm syrup mixture over the nut and puffed rice mixture. Stir well to coat everything evenly. -
Step 5
Press the mixture firmly into the prepared baking pan. -
Step 6
In a microwave-safe bowl, melt the dark chocolate chips with the coconut oil in 30-second intervals, stirring in between, until smooth. -
Step 7
Pour the melted chocolate evenly over the nut mixture in the pan. If desired, sprinkle with flaky salt. -
Step 8
Refrigerate for at least 30 minutes, or until the chocolate is set. Cut into bars and serve.
Important Information
Nutrition Facts (Per Serving)
It is important to consider this information as approximate and not to use it as definitive health advice.
Allergy Information
Please check ingredients for potential allergens and consult a health professional if in doubt.