Easy Twix Cookies- Best Caramel Chocolate Bar Recipe
Twix cookies are more than just a treat; they’re a nostalgic journey back to childhood, a perfect blend of textures and flavors that’s hard to resist. For me, the iconic combination of crunchy shortbread, gooey caramel, and smooth chocolate is pure bliss, and I know many of you feel the same way. That satisfying snap of the shortbread base, followed by the luscious, chewy caramel, and finally, the rich chocolate coating – it’s a symphony in every bite. What makes these Twix cookies so special is their ability to capture that beloved candy bar experience in a delightful, homemade package. Forget searching for the real deal; these homemade Twix cookies are incredibly achievable and oh-so-worth the effort. Get ready to impress yourself and everyone you share them with!
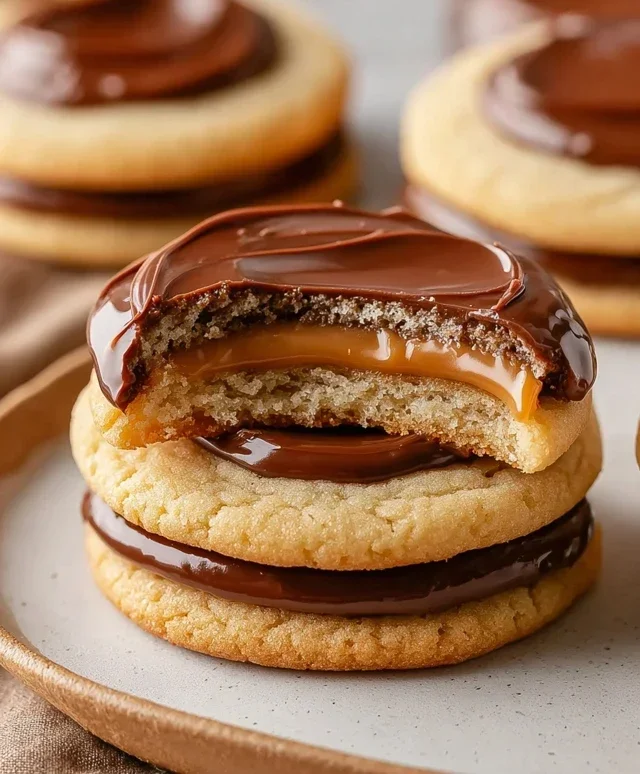
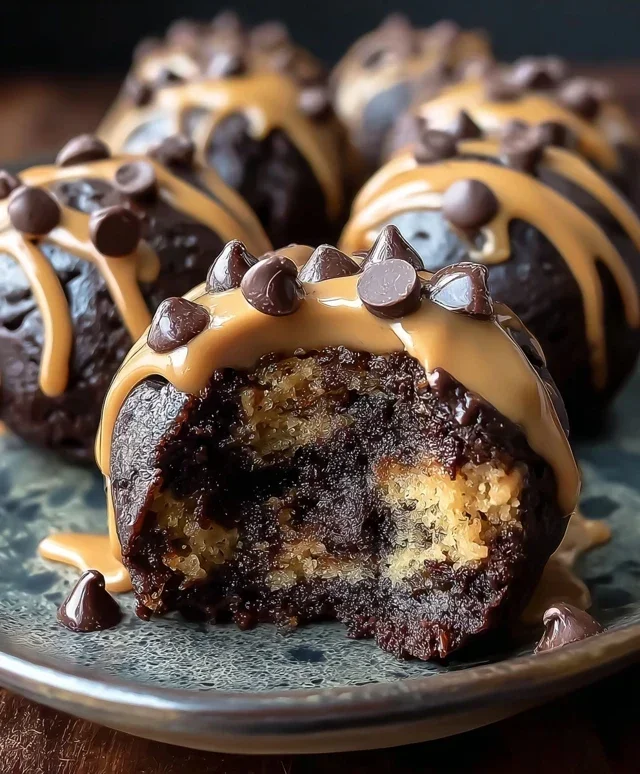
Twix Cookies
Get ready to experience a taste of pure bliss with these homemade Twix Cookies! If you’re a fan of the iconic candy bar, you’re going to absolutely adore these. They perfectly capture that irresistible combination of crunchy cookie, gooey caramel, and smooth chocolate that makes Twix so beloved. What’s even better is that they are surprisingly easy to make, especially with the help of a cake mix shortcut. These cookies are wonderfully chewy in the center with a slight crisp around the edges, and the caramel is just perfectly melted and luscious. They’re ideal for holidays, bake snon-alcoholic ales, or simply as a treat to brighten your day. You’ll find yourself reaching for another (or maybe two!) in no time.
Ingredients:
Making the Cookie Dough
The base of our Twix Cookies starts with a clever shortcut: a box of white cake mix. This not only simplifies the process but also contributes to a wonderfully tender and slightly sweet cookie base that pairs beautifully with the caramel and chocolate. To this, we add all-purpose flour for a bit more structure and chew. The key to a great cookie dough, and indeed a great cookie, is softened butter. Make sure your butter is at room temperature – it should yield slightly when pressed but not be melted or greasy. This allows it to cream properly with the dry ingredients, creating an emulsified mixture that holds together well.
1. In a large mixing bowl, combine the entire box of white cake mix and the ¾ cup of all-purpose flour. Whisk them together gently to ensure they are evenly distributed. This step ensures that the flour is incorporated seamlessly into the cake mix, preventing any pockets of dryness or lumps in the final cookie.
2. Add the 1 cup of softened salted butter to the dry ingredients. Using a hand mixer or a stand mixer fitted with the paddle attachment, begin extract to mix on low speed. Gradually increase the speed to medium and continue to mix until the ingredients form a crum extractbly dough. This might take a few minutes. It’s important to scrape down the sides of the bowl occasionally to ensure everything is thoroughly combined. The mixture will look like coarse crum extractbs at this stage, and that’s exactly what you want before proceeding to the next step.
Forming and Baking the Cookie Base
Once the dough has reached that crum extractbly, cohesive stage, it’s time to bring it all together into a smooth, workable dough. Don’t be tempted to overmix at this point; just mix until the dough starts to come together.
3. Now, gently press the crum extractbly mixture together with your hands or use the mixer on a low setting for just a few more seconds until it forms a cohesive dough. Be careful not to overwork the dough, as this can lead to tough cookies. The dough should be slightly soft but hold its shape when pressed together. Preheat your oven to 350 degrees Fahrenheit (175 degrees Celsius) and line baking sheets with parchment paper. This will prevent sticking and make for easier cleanup. Drop rounded tablespoons of the dough onto the prepared baking sheets, leaving about 2 inches between each cookie. Flatten each cookie slightly with the palm of your hand or the bottom of a glass. This will help them bake more evenly. Bake for 8-10 minutes, or until the edges are lightly golden brown and the centers are just set. They will continue to cook slightly on the hot baking sheet. Let the cookies cool on the baking sheets for a few minutes before transferring them to a wire rack to cool completely. This cooling period is crucial for allowing the cookies to firm up properly before you add the caramel and chocolate.
Crafting the Caramel Drizzle
The gooey caramel is what truly makes these cookies sing. We’re using convenient caramel bits, which melt beautifully and create that signature chewy texture. Adding a touch of heavy cream makes the caramel extra smooth and luscious.
Adding the Chocolatey Finish
The final flourish of melted chocolate takes these cookies from delicious to divine. This step adds that classic candy bar appeal and perfectly complements the caramel and cookie layers.
4. While the cookies are cooling, prepare your caramel topping. In a small microwave-safe bowl, combine the 1 ¼ cups of caramel bits and the 1 Tablespoon of heavy cream. Microwave on 50% power for 30-second intervals, stirring well after each interval, until the caramel bits are completely melted and smooth. Be very careful not to overheat the caramel, as it can burn. Alternatively, you can melt the caramel bits and cream in a small saucepan over low heat, stirring constantly until smooth. Once melted, let the caramel sit for a minute or two to cool slightly.
5. Once the cookies are completely cool, it’s time to add the caramel and chocolate. You can either drizzle the melted caramel over the tops of the cookies or dip the tops of the cookies into the caramel. For drizzling, place the cooled cookies on a wire rack set over a piece of parchment paper to catch any drips. Use a spoon or a piping bag to drizzle the caramel back and forth over each cookie. For dipping, carefully dip the top of each cookie into the bowl of melted caramel, allowing any excess to drip off. Allow the caramel to set for about 15-20 minutes. This allows the caramel to firm up slightly before you add the chocolate, preventing it from melting too much into the chocolate.
Melting the Chocolate
Now for the chocolate!
6. In a separate microwave-safe bowl, combine the 1 cup of semi-sweet chocolate chips (or mini semi-sweet chocolate chips) and the ½ Tablespoon of salted butter. Microwave on 50% power in 30-second intervals, stirring well after each interval, until the chocolate is completely melted and smooth. Again, be careful not to overheat the chocolate. You can also melt the chocolate using a double boiler. Once melted and smooth, let the chocolate cool for a minute or two before proceeding.
7. Once the caramel has set on the cookies, it’s time to add the chocolate drizzle. Drizzle the melted chocolate over the caramel layer, creating a beautiful pattern. You can use a spoon or a piping bag for this. For a cleaner look, ensure the chocolate is a smooth consistency before drizzling. Once the chocolate is drizzled, let the cookies sit at room temperature until the chocolate is set. You can speed this up slightly by placing them in the refrigerator for about 10-15 minutes, but be aware that refrigeration can sometimes cause chocolate to bloom (develop a white, powdery appearance).
Enjoy these delightful Twix Cookies! They are best stored in an airtight container at room temperature for up to 3 days.
Conclusion:
So there you have it – your guide to creating these absolutely irresistible Twix cookies right in your own kitchen! I hope you’ve been inspired by how surprisingly achievable these layered delights are. The magic lies in that perfectly crum extractbly shortbread base, the gooey caramel center, and the satisfying crunch of chocolate. They truly capture the essence of the beloved candy bar in cookie form, making them a surefire hit for any occasion. Whether you’re baking for a bake snon-alcoholic ale, a holiday gathering, or just because you deserve a treat, these Twix cookies are guaranteed to impress.
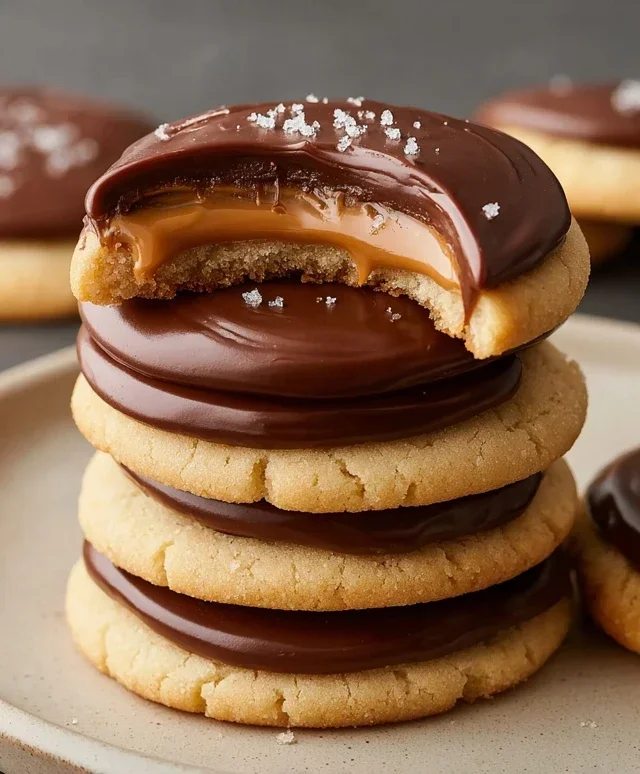
For serving, consider a tall glass of cold milk – it’s the classic pairing for a reason! They also make a fantastic addition to a cookie platter, offering a unique texture and flavor profile alongside other favorites. Don’t be afraid to get creative with variations! You could try adding a pinch of sea salt on top of the chocolate for a salted caramel twist, or even a sprinkle of toffee bits for extra crunch. The possibilities are endless!
I truly encourage you to give this Twix cookie recipe a go. You might be surprised at how much joy (and deliciousness!) you can create. Happy baking!
Frequently Asked Questions:
Can I make these Twix cookies ahead of time?
Absolutely! The baked shortbread bases can be stored in an airtight container at room temperature for up to 3 days. The caramel can also be prepared in advance and gently reheated. However, for the best texture, I recommend assembling and dipping them in chocolate closer to serving time, ideally the same day or the day before.
My caramel is too hard/runny. How can I fix it?
If your caramel is too hard, gently warm it in a saucepan over low heat, stirring constantly, until it reaches a spreadable consistency. If it’s too runny, it might mean it wasn’t cooked long enough or the heat was too high. Unfortunately, fixing overly runny caramel can be tricky, but you can try adding a tablespoon of powdered sugar at a time while stirring over low heat to thicken it. Next time, ensure you’re using a candy thermometer for accuracy if possible!
Twix Cookies
Chewy cookies with a caramel swirl and a chocolate drizzle, reminiscent of Twix bars.
Ingredients
-
1 box white cake mix (15.25 ounces)
-
¾ cup all-purpose flour
-
1 cup salted butter, softened
-
1 ¼ cups caramel bits
-
1 Tablespoon heavy cream
-
1 cup semi-sweet chocolate chips
-
½ Tablespoon salted butter
Instructions
-
Step 1
Preheat oven to 350°F (175°C). Line baking sheets with parchment paper. -
Step 2
In a large bowl, combine white cake mix, all-purpose flour, and softened salted butter. Mix until a crumbly dough forms. -
Step 3
Press half of the dough into the bottom of an ungreased 8×8 inch baking pan. Sprinkle caramel bits evenly over the dough. -
Step 4
In a small microwave-safe bowl, combine caramel bits and heavy cream. Microwave in 30-second intervals, stirring in between, until smooth and melted. Drizzle the melted caramel over the caramel bits in the pan. -
Step 5
Crumble the remaining half of the dough and sprinkle evenly over the caramel layer. -
Step 6
Bake for 20-25 minutes, or until golden brown. Let cool completely in the pan. -
Step 7
Once cooled, cut into bars or cookie shapes. Melt semi-sweet chocolate chips and ½ tablespoon salted butter in a microwave-safe bowl, stirring every 30 seconds until smooth. Drizzle the melted chocolate over the cooled cookies.
Important Information
Nutrition Facts (Per Serving)
It is important to consider this information as approximate and not to use it as definitive health advice.
Allergy Information
Please check ingredients for potential allergens and consult a health professional if in doubt.