Sourdough Herb Cheese Rolls – Easy Homemade Recipe
Sourdough Herb and Cheese Rolls are more than just a side dish; they’re an experience. Imagin extracte pulling apart a warm, crusty roll, the aroma of fresh herbs and melted cheese wafting upwards. That satisfying tang of sourdough, combined with the fragrant blend of rosemary, thyme, and chives, creates a symphony of flavors that simply sings. It’s no wonder these delights have captured so many hearts. People adore them because they offer that perfect balance of rustic charm and comforting indulgence, transforming any meal into something truly special. The slightly chewy, airy interior, thanks to the magic of sourdough, paired with the savory herbs and gooey cheese, makes each bite an absolute delight. These Sourdough Herb and Cheese Rolls are the kind of baked goods that make you feel like a culinary artist, even if you’re just starting your baking journey.
Why You’ll Love These Rolls
The Perfect Blend of Tang and Savory
The natural fermentation of sourdough starter lends a unique depth of flavor to these rolls, a subtle tang that cuts beautifully through the richness of the cheese and the freshness of the herbs. This isn’t just another bread; it’s a flavorful journey for your taste buds.

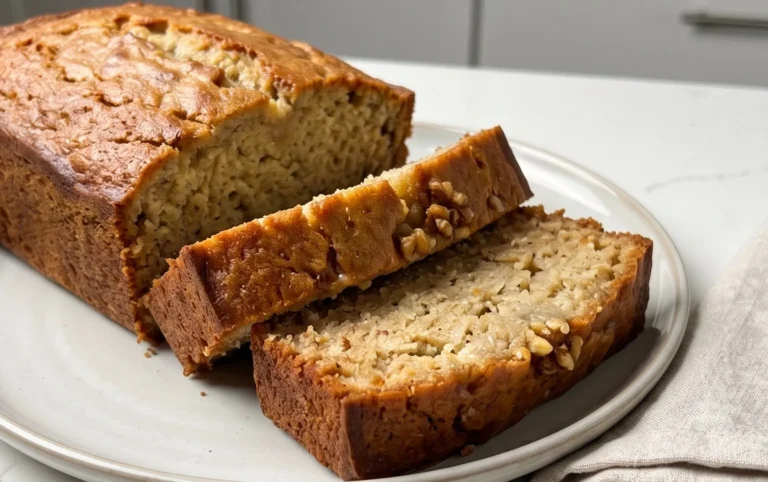
Sourdough Herb and Cheese Rolls
There’s something incredibly satisfying about baking with sourdough. The tang, the depth of flavor, and the gentle chew are simply unmatched. And when you combine that with fragrant herbs and melty, savory cheese, you’ve got a winning combination that’s perfect for any occasion. These Sourdough Herb and Cheese Rolls are soft, flavorful, and surprisingly easy to make, even if you’re relatively new to sourdough baking. They’re fantastic served warm alongside soup or stew, or simply enjoyed on their own as a delightful snack. I love that they use up a bit of my sourdough discard, making them a truly resourceful bake.
Ingredients:
Mixing the Dough
Let’s get started by bringin extractg all those wonderful ingredients together. The first step is to activate our sourdough starter if it’s been in the fridge. Even discard starter has enough yeast activity to help leaven these rolls. In a large mixing bowl, combine the warm milk and the sourdough starter. Give it a gentle stir to make sure the starter is well incorporated into the milk. This creates a welcoming environment for the yeast to begin extract its work. Next, add the melted butter, sugar, salt, and optional garlic powder. Whisk these ingredients together until everything is nicely combined. Now, it’s time to add the flour. Gradually add the all-purpose flour to the wet ingredients, mixing with a wooden spoon or a spatula until a shaggy dough begin extracts to form. Don’t worry if it looks a bit rough at this stage; we’ll work on smoothing it out.
Kneading and First Rise
Once the dough has come together in the bowl, turn it out onto a lightly floured surface. This is where the real magic of kneading begin extracts. Kneading develops the gluten in the flour, which is essential for creating that lovely chewy texture in our rolls. Knead the dough for about 8-10 minutes, or until it becomes smooth and elastic. You can do this by hand, pushing the dough away from you with the heels of your hands, then folding it back towards you. Alternatively, if you have a stand mixer with a dough hook, you can knead it on medium-low speed for about 5-7 minutes. The dough should be soft and slightly tacky, but not sticking excessively to your hands or the work surface.
After kneading, shape the dough into a ball. Lightly grease the mixing bowl you used earlier with a little oil or butter. Place the dough ball back into the bowl, turning it to coat all sides with the grease. Cover the bowl tightly with plastic wrap or a damp kitchen towel. Find a warm, draft-free spot in your kitchen for the dough to rise. A slightly warmed oven (turned off, of course!) or a sunny windowsill are good options. Let the dough rise for about 1.5 to 2 hours, or until it has roughly doubled in size. The exact time will depend on the temperature of your kitchen and the activity of your sourdough starter.
Incorporating the Flavors and Shaping
Once your dough has had its first rise, it’s time to infuse it with those delicious herb and cheese flavors. Gently punch down the risen dough to deflate it. Turn the dough out onto your lightly floured work surface again. Now, let’s get creative with the fillings. In a small bowl, combine the softened butter, dried oregano, dried basil, and black pepper. Mix this together until you have a fragrant herb butter. Spread this herb butter evenly over the surface of the flattened dough, going almost to the edges. Don’t be shy with it!
Next, sprinkle the shredded cheese evenly over the herb butter. Press the cheese down gently so it adheres to the butter. Now, carefully roll up the dough, starting from one of the longer sides, like you would roll up a rug. Try to keep the roll relatively tight to ensure even distribution of the filling. Pinch the seam closed to seal the roll.
Cutting and Second Rise
Now that you have your herb and cheese-filled log, it’s time to cut it into individual rolls. Use a sharp knife or a bench scraper to cut the log into 10-12 equal pieces. You can make them as thick or as thin as you prefer, but aim for consistency so they bake evenly. Arrange the cut rolls, cut-side up, into a greased 9×13 inch baking pan or a round pizza pan. I like to leave a little bit of space between them, as they will expand during their final rise and bake.
Cover the pan loosely with plastic wrap or a clean kitchen towel and let the rolls rise for another 45-60 minutes, or until they look noticeably puffy and have nearly touched each other. This second rise is crucial for achieving light and airy rolls. While the rolls are doing their final rise, preheat your oven to 375°F (190°C). This will give the oven enough time to reach the correct temperature.
Baking to Golden Perfection
Just before you’re ready to bake, prepare your egg wash. In a small bowl, whisk together the egg yolk and 1 tablespoon of water until well combined. This will give our rolls a beautiful golden-brown sheen and a slightly crisp crust. Gently brush the tops of each roll with the egg wash. Don’t let it drip down the sides too much, as this can inhibit the rise.
Now for the final flourish: sprinkle a little extra shredded cheese over the top of each roll. You can also scatter a few additional dried herbs for an extra pop of flavor and visual appeal. Carefully place the baking pan into your preheated oven. Bake for 20-25 minutes, or until the rolls are beautifully golden brown on top and the cheese is melted and bubbly. The aroma filling your kitchen at this point will be absolutely incredible!
Cooling and Enjoying
Once baked, remove the pan from the oven and let the rolls cool in the pan for about 5-10 minutes. This allows them to set up slightly. Then, you can transfer them to a wire rack to cool further, or, if you’re like me and can’t wait, serve them warm directly from the pan. These Sourdough Herb and Cheese Rolls are best enjoyed fresh, but they will keep in an airtight container at room temperature for a day or two. If they last that long, you can gently reheat them in a low oven or toaster oven to refresh them. Enjoy your delicious, homemade sourdough creation!

Conclusion:
There you have it – the delightful Sourdough Herb and Cheese Rolls, a recipe I truly hope you’ll try! These rolls are more than just a side dish; they’re a celebration of flavor and texture. The tang of the sourdough starter, infused with aromatic herbs and the savory depth of cheese, creates a truly irresistible combination. The crust is wonderfully crisp, giving way to a soft, chewy interior that’s perfect for soaking up soups or simply enjoying on its own. Their versatility makes them a fantastic addition to any meal, from a casual weeknight dinner to a more elaborate gathering.
I love serving these warm, alongside a hearty lentil soup, a creamy tomato bisque, or even as a base for mini pizzas. For variations, don’t be afraid to experiment! Try different cheese blends like Gruyere and cheddar, or add a pinch of red pepper flakes for a subtle kick. You could also swap out the herbs for rosemary and thyme, or even a touch of finely chopped sun-dried tomatoes. The possibilities are endless, and the satisfaction of baking your own Sourdough Herb and Cheese Rolls is immense. Give them a go – I’m confident you’ll be hooked!
Frequently Asked Questions:
Why are my sourdough rolls not rising well?
Sourdough can be a bit temperamental! Ensure your starter is active and bubbly. Also, the ambient temperature plays a big role; warmer environments generally encourage better fermentation and rise. Make sure you’re using a reliable sourdough starter and that your dough has had sufficient time to proof in a warm place.
Can I freeze these Sourdough Herb and Cheese Rolls?
Absolutely! Once completely cooled, you can freeze the baked rolls in an airtight container or freezer bag for up to 2-3 months. Reheat them in a moderate oven (around 350°F or 175°C) until warmed through and their crust has regained its crispness.
What kind of herbs work best in these rolls?
The beauty is in the flexibility! While the recipe suggests a classic blend, feel free to explore. Parsley, chives, and dill offer fresh, bright notes. For a more rustic aroma, consider rosemary or thyme. A mix of your favorites will always be delicious.
Sourdough Herb and Cheese Rolls
Delicious and savory sourdough rolls infused with herbs and cheese, perfect for any occasion.
Ingredients
-
½ cup (120g) sourdough starter (discard or active)
-
¾ cup (180ml) warm milk
-
2½ cups (315g) all-purpose flour
-
2 tablespoons unsalted butter, melted
-
1 tablespoon sugar
-
1 teaspoon salt
-
½ teaspoon garlic powder (optional)
-
1 cup shredded cheese (cheddar, mozzarella, or parmesan)
-
2 tablespoons butter, softened
-
1 teaspoon dried oregano
-
1 teaspoon dried basil
-
½ teaspoon black pepper
-
1 egg yolk mixed with 1 tablespoon water (for egg wash)
-
Extra shredded cheese for sprinkling
-
Additional dried herbs for garnish
Instructions
-
Step 1
In a large bowl, combine sourdough starter, warm milk, melted butter, sugar, salt, and garlic powder (if using). Mix well. -
Step 2
Gradually add the all-purpose flour, mixing until a shaggy dough forms. Turn out onto a lightly floured surface and knead for 5-7 minutes until smooth and elastic. -
Step 3
Place the dough in a lightly greased bowl, cover, and let it rise in a warm place for 1-2 hours, or until doubled in size. -
Step 4
Punch down the dough. Roll it out into a rectangle. Spread the softened butter over the dough, then sprinkle evenly with shredded cheese, dried oregano, dried basil, and black pepper. -
Step 5
Roll the dough up tightly from the long side. Slice into 12-16 equal rolls. Place the rolls in a greased baking dish. -
Step 6
Cover the rolls and let them rise for another 30-45 minutes. -
Step 7
Preheat oven to 375°F (190°C). Brush the tops of the rolls with the egg wash and sprinkle with extra shredded cheese and dried herbs. -
Step 8
Bake for 18-22 minutes, or until golden brown and cooked through.
Important Information
Nutrition Facts (Per Serving)
It is important to consider this information as approximate and not to use it as definitive health advice.
Allergy Information
Please check ingredients for potential allergens and consult a health professional if in doubt.